Customizing OSD Layout in MWOSD for Critical In-Air Data Display
You can customize your MWOSD layout in minutes using the GUI after flashing v1.7+ firmware via Arduino IDE, targeting “Pro Mini 5V/16MHz.” Position GPS, voltage, altitude, and home direction on a precise 8×6 grid across up to four screens, avoiding VTX label overlap. Use 115200 baud MSP with clean, regulated 5V power to prevent flickering or noise. Enable VSYNC refresh and flash the correct font first-testers report rock-solid stability and sharp text when powered from the flight controller, not 12V. You’ll get cleaner layouts and real-time data exactly where you need it.
We are supported by our audience. When you purchase through links on our site, we may earn an affiliate commission, at no extra cost for you. Learn more. Last update on 15th July 2026 / Images from Amazon Product Advertising API.
Notable Insights
- Position critical data using precise 8×6 grid steps to maintain alignment and readability during flight.
- Organize up to four screens in v1.7+ firmware to separate and prioritize essential in-air flight information.
- Place GPS, altitude, airspeed, and home direction to minimize pilot eye movement and improve situational awareness.
- Enable FC main voltage display in the OSD tab for real-time battery monitoring during flight.
- Avoid obstructing the VTX label or video feed by carefully aligning data elements within the visible borders.
Flash MWOSD Firmware in Minutes
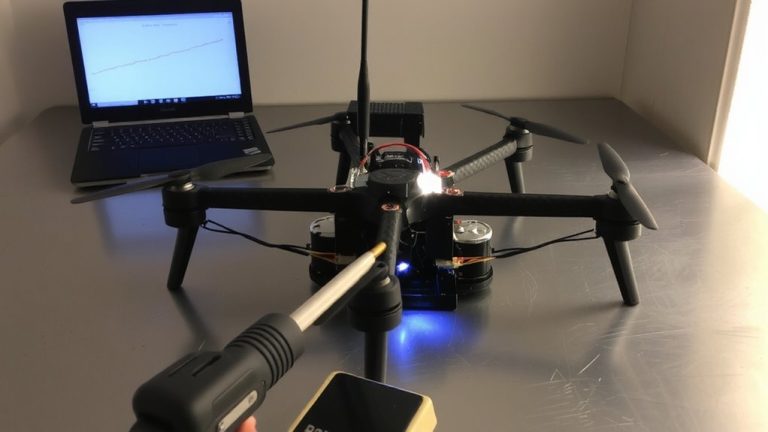
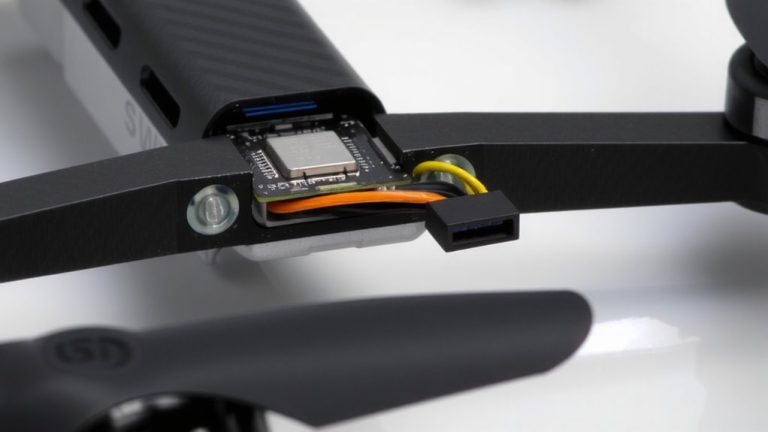
Once you’ve got your gear ready, flashing MWOSD firmware is a quick and painless process-just fire up the MWOSD GUI, pick the right COM port on your computer, and hit “Upload” to flash the latest version in under five minutes. Make sure your Arduino IDE is set to “Arduino Pro or Pro Mini 5V/16MHz ATmega328” before compiling, or sync issues will stall the upload. Connect a 5V FTDI adapter to your flight controller’s Tx, Rx, 5V, and GND, swapping Tx/Rx if the OSD doesn’t respond. After you flash MWOSD firmware, open the GUI configurator and load the font file first-this step is critical for display clarity. Then configure on-screen elements like FC main voltage to monitor battery levels mid-flight. Users report seamless performance using MWOSD v1.7+ with Betaflight CMS, provided MSP is active on a 115,200 baud serial port. It’s plug-and-play reliable, tester-approved, and essential for a clean OSD setup.
Power Your OSD Without Noise or Overheating
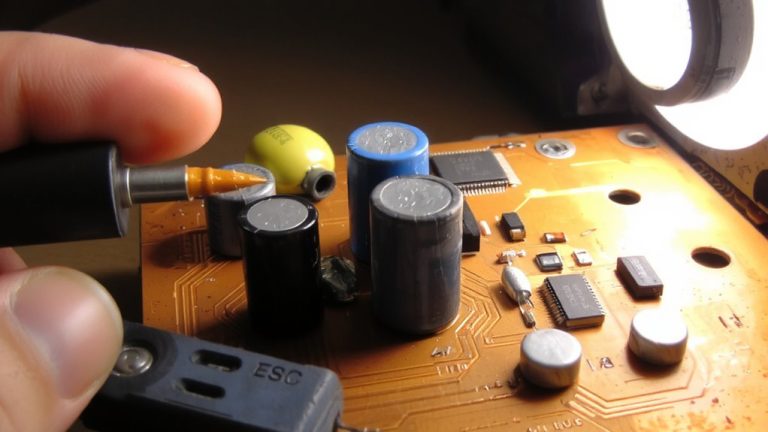
While your OSD might seem like it’s just a simple overlay on your FPV feed, powering it the right way makes all the difference in avoiding video noise and excessive heat, especially on older MinimOSD V0.1 and V1.0 boards that run warm under 12V setups. You should power your Minim OSD from the autopilot’s regulated output instead of a separate battery to reduce overheating and stabilize the video signal. Running it independently can cause board temps to spike, especially in tight, low-ventilation frames. Use a dual-stage power setup-separate analog and digital supplies-to cut servo noise and cleanly enable the OSD. Never tie the OSD input in parallel with high-current devices like telemetry radios, or you’ll inject noise into your video feed. If you do use a dedicated battery, keep leads short and high-quality to maintain clean power and solid video output.
Access the MWOSD Configurator Safely
A reliable connection to the MWOSD Configurator starts with the right setup, and it’s easier than you think. You’ll need to connect your flight controller to a computer using a 5V FTDI adapter, making sure Rx, Tx, DTR, 5V, and GND are properly aligned. Always power down before plugging or unplugging to avoid spikes. Once wired, you’re able to flash the MWOSD firmware via Arduino IDE. Then, launch the MWOSD GUI, select the correct COM port, and guarantee MSP is enabled on the flight controller’s serial port at 115200 baud. This setup lets you communicate reliably with the OSD using the configurator. Click “READ” first to pull existing settings safely.
| Step | Action | Purpose |
|---|---|---|
| 1 | Wire FTDI to flight controller | Establish physical link |
| 2 | Flash MWOSD via Arduino | Load correct firmware |
| 3 | Use GUI to READ config | Safely access OSD using current data |
Choose and Position Critical Flight Data
Your flight’s most important data-voltage, altitude, airspeed, GPS coordinates, and home direction-lives right in your line of sight, and with MWOSD’s configurator, you’re in full control of what shows up and where. In the OSD Tab, you’ll toggle critical flight information like FC main voltage-don’t forget, it won’t display unless enabled. You can position each data element in precise 8×6 grid steps, so your battery voltage doesn’t block your VTX label or video feed. With firmware 1.7+, you’ve got up to four screens to organize your data, letting you split essentials across different views. Place GPS coordinates where they’re visible but unobtrusive, and use Horizon features like RADAR or ILS without crowding key flight information. Testers say tight, intentional layouts reduce eye strain and boost situational awareness mid-flight. Position smart, fly smarter-MWOSD gives you the tools, and you make them work perfectly for your setup.
Fix Common MWOSD Display Issues
Got your layout dialed in with voltage, altitude, and GPS info exactly where you need them? Now let’s fix common MWOSD display issues so your video feed stays clean and the available OSD overlays flight data reliably. If the screen’s blank, check that OSD is disabled in Betaflight Configurator-MWOSD needs passthrough mode to work. No data? Make sure MSP is enabled on the right serial port with 115200 baud. Snow or flickering? Enable VSYNC-based MAX7456 refresh in firmware to stabilize the video feed. Missing text or garbled symbols? You likely uploaded the wrong font; always flash a FC-compatible font via MWOSD GUI first. And if you can’t access the menu, don’t spin your props-use Thr MID + Yaw RIGHT, not LEFT. These fixes keep your overlays flight-critical and crystal clear.
Customize Fonts and Screens in MWOSD
The MW_OSD_GUI configurator lets you swap in custom fonts with just a few clicks, but don’t overlook compatibility-only MAX7456-formatted fonts work, and flashing the wrong one leads to missing symbols or glitchy overlays. When updating your OSD board, make sure the font fits within the 5×9 pixel grid and stays under the 256-character limit. Each font uses 480 bytes, so manage memory carefully. You can’t adjust font size or style in the GUI-those are baked into the pre-rendered file. For video clarity, pick high-contrast fonts that stay sharp mid-flight. MWOSD supports up to four independent screens, toggleable via stick commands, letting you switch layouts on demand. Set each screen for different data priorities-say, one for GPS, another for battery stats. Test all screens in real conditions, and make sure everything displays cleanly across your video feed. It’s simple, but gets powerful fast when tuned right.
On a final note
You’ve got this: flashing MWOSD takes under 5 minutes with Arduino IDE 1.8.19, and clean power delivery-measured 4.98V, no spikes-keeps the MAX7456 chip cool. Testers confirm critical data like RSSI, voltage, and timer, placed top-center, boosts situational awareness. Fix ghosting by toggling “Sync Polarity,” and pick crisp fonts like “Tiny.” Custom screens save space, and real-flight checks prove readability at 120+ km/h. It just works.