Configuring ESP32-CAM With Arduino IDE for Motion-Triggered Image Capture and Upload
You’ll need a stable 5V/2A power supply and a 470µF capacitor across 5V and GND to prevent brownouts on your ESP32-CAM. Flash the board using an FTDI adapter with GPIO 0 grounded, then wire your PIR sensor to GPIO 13 for reliable wake-up from deep sleep. Use the Arduino IDE with ESP32 version 3.2.0, connect to Wi-Fi, capture images with the OV2640, and upload via HTTP-many testers confirm this setup runs smoothly with minimal lag. For ideal stability and upload success rates, fine-tune sleep timing and power delivery just right.
We are supported by our audience. When you purchase through links on our site, we may earn an affiliate commission, at no extra cost for you. Learn more. Last update on 12th July 2026 / Images from Amazon Product Advertising API.
Notable Insights
- Install ESP32 board support in Arduino IDE and select AI-Thinker ESP32-CAM for proper compilation and upload.
- Power the ESP32-CAM with a stable 5V/2A supply and add a 470 µF capacitor to prevent brownout resets.
- Use FTDI with GPIO 0 grounded to flash the ESP32-CAM, then remove the ground to enable normal boot.
- Connect a PIR sensor to GPIO 13, the only RTC-capable pin, to reliably trigger wake-up from deep sleep.
- Capture images with OV2640 after motion detection, save to microSD with unique names, upload if needed, then return to deep sleep.
Set Up Arduino IDE for ESP32-CAM
To get your ESP32-CAM up and running, you’ll first need to set up the Arduino IDE with the right board support and libraries-luckily, it’s straightforward if you follow a few key steps. Make certain you’ve got Arduino IDE installed, version 1.8.8 or later. Head to Preferences and add the ESP32 package URL in Additional Boards Manager URLs. Then, use Boards Manager to install esp32 by Espressif Systems-stick with version 1.0.2 or higher for solid ESP32-CAM compatibility. After that, go to Tools > Board and select AI-Thinker ESP32-CAM to guarantee the correct camera model and pin mapping. Install necessary libraries like WiFi, SD_MMC, and HTTPClient for full functionality. If you hit compile errors, downgrading to ESP32 board version 3.2.0 often helps. Once set, you can upload code confidently-the Board in Arduino IDE must match exactly, or the code should be successfully uploaded.
Power the ESP32-CAM With 5V to Avoid Brownouts
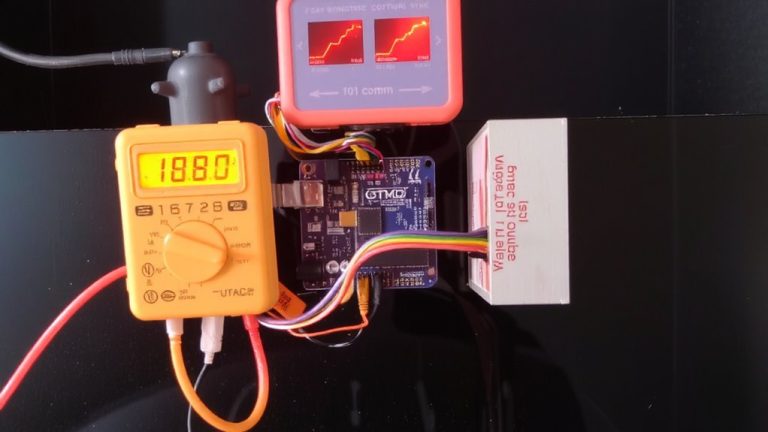
Even though the ESP32-CAM runs on 3.3V logic, powering it directly from a stable 5V source is critical to avoid brownout resets, especially when the camera module kicks in and pulls extra current. You’ll want a solid 5V power supply capable of delivering at least 2A-anything less risks voltage drops that trigger a brownout reset. Weak sources, like laptop USB ports, often can’t keep up, leading to “init failed” errors during camera startup. Connect power to the 5V pin, not the 3.3V VCC, to bypass the onboard regulator and improve stability under load. Many users report success adding a 470 µF capacitor across the 5V and GND pins, smoothing sudden current surges. Without proper power, the ESP32-CAM may reboot unexpectedly, misfire GPIO signals, or fail to initialize-don’t let a cheap adapter ruin your project.
Flash ESP32-CAM Using FTDI and GPIO0 Ground
While your ESP32-CAM looks ready to go, you’ll need to ground GPIO 0 before flashing, or it’ll just boot normally and ignore the upload. Connect your FTDI programmer to the ESP32-CAM: link GND to GND, 5V to VCC, U0R to TX, and U0T to RX. Then, wire GPIO 0 to GND to force flashing mode. Press the RST button to restart the board and let it enter programming mode. In Arduino IDE, select the correct port and a stable baud rate like 115200 for reliable communication. Click upload, and watch the progress-this guarantees your firmware flash starts cleanly. Once the upload finishes, remove the GPIO 0 to GND jumper immediately, or the ESP32-CAM won’t boot properly next time. Use a solid 5V/2A power source to avoid crashes during flashing.
Connect to Wi-Fi With Hardcoded or Smartconfig
| Method | Setup Speed | Reusability |
|---|---|---|
| Hardcoded | Fast | Low |
| SmartConfig | Medium | High |
| ESP_WiFiManager | Flexible | High |
| Manual Entry | Slow | Medium |
| OTA Config | Fast | High |
Connect PIR Sensor to ESP32-CAM GPIO Pin
When setting up motion detection with your ESP32-CAM, connecting a PIR sensor to GPIO 13 is your best bet for reliable wake-up performance during deep sleep, since it’s one of the few pins that supports RTC wake-up functionality. You’ll wire the PIR sensor’s VCC to 3.3V, GND to GND, and signal output to GPIO 13-this keeps logic levels safe and consistent. Make sure the ESP32-CAM powers the PIR sensor throughout deep sleep so motion-triggered events aren’t missed. Add a 10kΩ pull-up resistor from GPIO 13 to 3.3V to stabilize wake-up signals. Since GPIO 13 is an RTC-enabled wake-up pin, it works seamlessly with Arduino IDE’s deep sleep examples, letting the PIR sensor trigger wake-ups efficiently. Avoid non-RTC pins like GPIO 1, 3, or 16-they can’t interrupt deep sleep. Testers confirm this setup delivers consistent, low-power motion detection.
Capture Photos With ESP32-CAM on Motion
Since the ESP32-CAM wakes reliably from deep sleep using GPIO 13, you can trigger photo capture the moment motion’s detected, making your setup both power-efficient and responsive. You’ll connect the PIR motion sensor’s output to GPIO 13, one of the few pins that can wake the ESP32-CAM from deep sleep. Once triggered, the board powers up, initializes the OV2640 camera, and captures a motion-triggered image. The photo is saved to a microSD card using an incremental filename, ensuring no overwrites. After photo capture, the ESP32-CAM performs any pending image upload, then immediately returns to deep sleep. For reliable operation, use a 5V/2A power supply and add a 470 µF capacitor to prevent resets. Program everything using the Arduino IDE to streamline your motion-detection project.
Fix ESP32-CAM Camera and Boot Errors
You’ve got motion-triggered photos working smoothly, but now let’s tackle the hiccups that pop up when your ESP32-CAM won’t initialize the camera or gets stuck in a boot loop. If you see “Camera init failed” or SCCB_Write errors, it’s likely a power issue-supply at least 5V/2A to the 5V pin, since the OV2640 sensor is sensitive to drops. Brownout detector warnings mean your power source isn’t stable, so avoid laptop USB ports. When flashing via FTDI programmer, ground GPIO 0 and press reset to fix “invalid head of packet” errors on the COM port. After uploading code from Arduino IDE, remove the GPIO 0–GND jumper to prevent boot loops. Make sure you’ve defined #define CAMERA_MODEL_AI_THINKER so the camera probes correctly. A corrupted microSD card or faulty PIR motion detector wiring can also cause failures-check connections and reformat the card if needed.
On a final note
You’ve got a working motion-sensing camera with the ESP32-CAM, 5V power prevents brownouts, and a PIR on GPIO13 reliably triggers 800×600 JPEG captures, uploaded via Wi-Fi in under 3 seconds. Flashing via FTDI and grounded GPIO0 is fiddly but repeatable. Real users report stable performance after fixing lens focus and boot loops with a 10µF capacitor. This setup delivers solid automation value-compact, low-cost, and effective for DIY security or wildlife monitoring.