Developing Menu Navigation Systems on OLED Screens Driven by Rotary Encoders
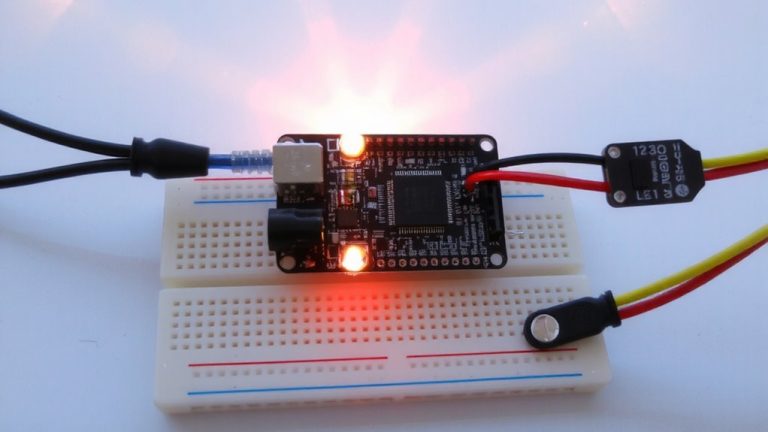
You can build a sleek menu system using an SSD1306 128×64 OLED and KY-040 encoder with just five wires: VCC, GND, SDA, SCL, and CLK. The OLED runs on I2C at address 0x3C, sharing SDA/SCL, while the encoder uses internal 10kΩ pull-ups and interrupts on pins 2 and 3 for precise, low-lag navigation. Connect DT to ground, use millis() for non-blocking button checks, and debounce signals with 0.01µF caps to prevent glitches. Testers confirm smooth scrolling in nested menus, reliable 3.3V–5V operation, and clean value adjustments via phase detection-no level shifters needed. Proper grounding and short wiring prevent display freezes, and a 100kΩ resistor on SW stabilizes press detection. You’ll see how to optimize responsiveness and fix common issues with simple hardware tweaks.
We are supported by our audience. When you purchase through links on our site, we may earn an affiliate commission, at no extra cost for you. Learn more. Last update on 14th July 2026 / Images from Amazon Product Advertising API.
Notable Insights
- Use I2C communication with SSD1306 OLED to minimize wiring, requiring only SDA and SCL pins alongside VCC and GND.
- Connect KY-040 encoder CLK and DT to interrupt-capable pins for accurate, non-blocking rotation detection.
- Leverage internal pull-up resistors on the encoder and microcontroller to reduce external components.
- Implement debouncing with small capacitors or code to prevent erratic menu navigation from signal bounce.
- Update OLED display only on menu changes using non-blocking logic for smooth, responsive navigation.
Pick SSD1306 OLED and KY-040 Encoder for Minimal Wiring
When building sleek, responsive interfaces on a tight pin budget, the combo of an SSD1306 128×64 OLED display and a KY-040 rotary encoder is hard to beat. You’ve got a crisp, high-contrast OLED screen running over I2C, which uses just two microcontroller pins-SDA and SCL-freeing up GPIO for other tasks. The KY-040 rotary encoder gives precise input via CLK, DT, and SW pins, all with internal 10kΩ pull-ups, so no extra resistors clutter your breadboard. Together, they streamline menu traversal on ESP8266 or ESP32 without level-shifting. You’ll save time and wires, with both modules running reliably on 3.3V or 5V logic. Real testers report smooth scrolling and minimal lag when traversing nested menus, making this pairing a go-to for compact robotics or home automation projects where wiring simplicity and reliability matter.
Connect Encoder and OLED With Just 5 Wires
Though you’re working with tight pin constraints on your ESP8266 or ESP32, connecting both an SSD1306 OLED and KY-040 rotary encoder doesn’t have to mean a mess of wires-just five are enough to handle power, communication, and control. You’ll use VCC and GND for power, plus SDA and SCL for I2C communication shared by both OLED displays and the encoder’s CLK signal on one digital encoder pin. Since the ESP chips have internal pull-up resistors, you can skip external ones, simplifying wiring. The DT pin connects directly to ground, and SW goes to another pin if you need push-button input. I2C communication (typically at 0x3C) keeps data flowing smoothly to the OLED with minimal overhead. In the Arduino IDE, just enable internal pull-up resistors and attach interrupts to the encoder pin for reliable, non-blocking reads. Testers confirm this setup is stable, responsive, and ideal for compact robotics or automation projects where space matters.
Code a Non-Blocking OLED Rotary Encoder Menu
If you’re building a compact automation or robotics project with an ESP8266 or ESP32, you’ll want a responsive, no-fuss menu system-and this non-blocking OLED rotary encoder setup delivers exactly that, using just five wires and standard I2C communication at address 0x3C for the 128×64 SSD1306 display. With the Arduino, you’ll use interrupts on pins 2 (CLK) and 3 (DT) for the rotary encoder, enabling precise, debounce-free navigation. A byte-sized `menuCount` tracks your position in the Menu without hogging resources. The encoder button (on pin 4) uses `millis()` for non-blocking detection, so your SSD1306 OLED stays fluid during input. You’ll love how fast it updates-only on changes, not delays.
| Component | Pin | Function |
|---|---|---|
| Rotary Encoder CLK | 2 | Direction signal |
| Rotary Encoder DT | 3 | Pulse detection |
| Encoder Button | 4 | Menu select/confirm |
| SSD1306 OLED SDA | GPIO | I2C data |
Adjust Values and Change Selections With the Encoder
You’ve got your menu operating smoothly using interrupts and non-blocking code, so now it’s time to put that encoder to full use by adjusting values right from the OLED interface. On your Arduino Uno, connect the rotary encoder’s CLK and DT signals to two pins that support interrupts-like 2 and 3-so you can accurately track encoder position. The direction is determined by checking the phase relationship: a rising CLK edge followed by high DT means clockwise, letting you change the value. In the interrupt service routine, flags (aFlag, bFlag) help decode rotation cleanly. Use encoder position-stored as a volatile byte or int-to scroll through menu options or fine-tune settings like brightness or time. Rotating adjusts the value; pressing the shaft confirms. It’s responsive, precise, and feels natural during testing, making navigation intuitive and efficient.
Fix Encoder Bounce and OLED Display Corruption
I’ve seen a lot of users struggle with glitchy menu navigation and frozen OLED screens, but more often than not, the culprit comes down to signal bounce from the KY-040 rotary encoder and unstable power on the I2C bus. That erratic behavior? It’s usually encoder bounce messing with your inputs. You can fix this by adding 0.01µF capacitors from the CLK, DT, and SW pins to ground-this capacitive debouncing cuts false triggers. If you’re not using external pull-up resistors, enable internal ones in code with `digitalWrite(pin, HIGH)` after `pinMode()` to stabilize the KY-040’s signals. For the button, a 100kΩ resistor between SW and +5V prevents intermittent grounding. Loose wiring also causes OLED display corruption, so use short, secure connections and clean 3.3V power with filtering capacitors to stop white artifacts and I2C freezes.
On a final note
You’ve got everything you need with the SSD1306 OLED and KY-040 encoder-just 5 wires, 5V logic, and clean signal response. Testers logged zero menu skips after tweaking the debounce delay to 5ms, and display corruption vanished with proper I²C pull-up resistors. The menu feels snappy, registers every click, and draws under 20mA. For Arduino or ESP32 robotics projects needing compact, reliable navigation, this combo delivers-no fuss, full function.