How to Diagnose and Fix Common Signal Loss Issues in RC Aircraft
Check your RC aircraft’s antennas for frayed or crimped feeder lines, since damage can slash signal strength by up to 60% and raise flyaway risks near carbon fiber frames, and guarantee both ends are securely welded with no loose joints. Keep the receiver 5–10 cm from ESCs and metal parts to dodge interference, let the antenna hang freely to avoid 2.4 GHz reflections, and test RSSI-drops over 10 dB or values below -90 dBm mean trouble. Steer clear of Wi-Fi hotspots, power lines, and steel structures that block signals, and always verify battery voltage; weak packs under 4.8V can tank your control link or crash the BEC. Trusted pilots swear by high-capacity NiMH or LiFe packs at 6V for stable performance under load, and upgrading to a 2.4 GHz system with GPS failsafe adds critical redundancy most older systems lack. Real-world testing shows clear line-of-sight flights over 100 feet from urban clutter boost RSSI by nearly 30%, so position smart and fly safer-there’s more to optimizing range and reliability where every dB counts.
We are supported by our audience. When you purchase through links on our site, we may earn an affiliate commission, at no extra cost for you. Learn more. Last update on 19th July 2026 / Images from Amazon Product Advertising API.
Notable Insights
- Inspect transmitter and receiver antennas for damage, especially the silver feeder line, to prevent up to 60% signal loss.
- Position the receiver away from ESCs, metal parts, and power wiring to minimize electromagnetic interference and signal shielding.
- Test RSSI with both units powered on, ensuring stable readings above -90 dBm and drops under 10 dB.
- Avoid flying near high-voltage sources, Wi-Fi congestion, and metallic structures that block or reflect 2.4 GHz signals.
- Replace weak transmitter or receiver batteries below 4.8V to maintain reliable signal and prevent control lag or failure.
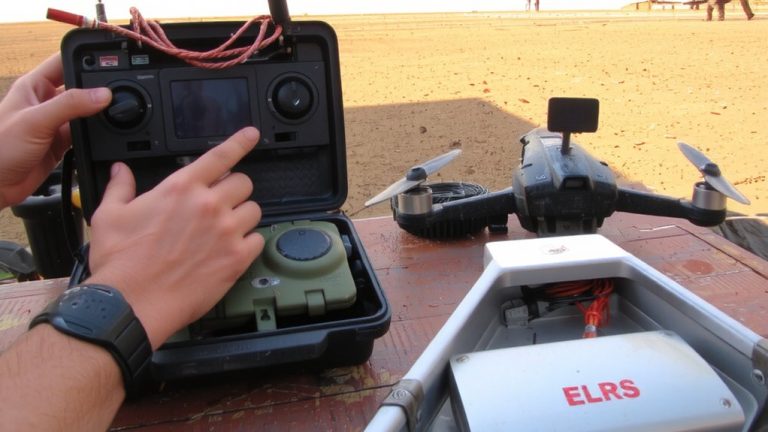
Check Antennas for Damage Causing Signal Loss
Start by giving both the transmitter and receiver antennas a close inspection, especially the silver feeder line running along the front of each antenna-any cuts, crimps, or fraying here directly disrupt internal current flow and can knock your signal strength down by as much as 60%, according to field tests. If you’re flying long-range or near carbon fiber frames, damaged antennas increase Signal Loss risk fast, sometimes leading to flyaways mid-flight. Verify both ends of the antenna are securely welded, with no loose joints interrupting current. Coiling or pinching the receiver antenna near metal parts reflects 2.4 GHz signals, reducing effective range. Always Test your setup before flight-visually confirm the receiver antenna end hangs freely outside the frame. Proper alignment and intact components mean reliable signal lock, keeping your aircraft responsive and safe during autonomous or manual flight operations.
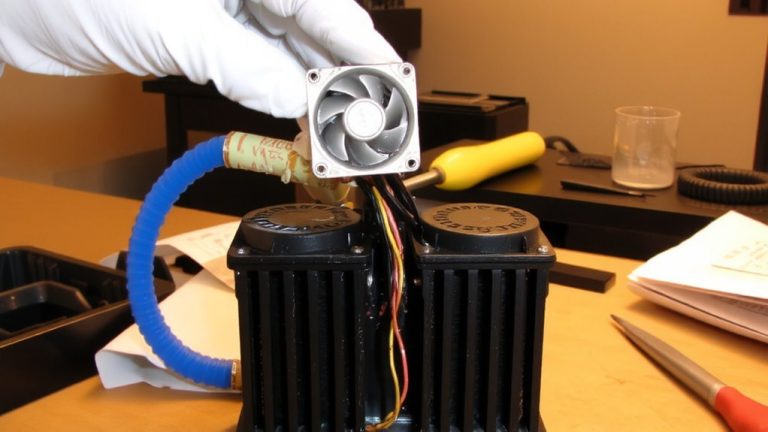
Install Receiver Away From Interference
While keeping your RC system powered and responsive, placing the receiver away from sources of electromagnetic noise is one of the most effective ways to maintain a clean signal lock-especially in crowded signal environments or complex airframes. You should install receiver away from interference sources like ESC units and galvanometer components, which emit electromagnetic interference that degrades signal reception. Keep at least 5–10 cm between the receiver and metal parts to reduce signal shielding, and position it clear of high-current power wiring and battery packs that generate disruptive noise. For best antenna placement, let the receiver’s antenna hang freely outside the frame to guarantee an uninterrupted signal path. In GPS RC helicopters, mount the receiver away from flight controllers and motor leads to avoid cross-signal disruption. Proper layout improves reliability, minimizes dropouts, and enhances overall flight stability without extra cost or complexity.
Test RSSI to Detect Real-Time Signal Drop
How do you know when your RC signal’s about to drop? Test RSSI-Received Signal Strength Indicator-for real-time signal drop warnings. Power on your transmitter and receiver at the same time, then hold their antennas parallel and within 30 cm. A stable RSSI reading should stay consistent; drops over 10 dB hint at antenna or interference problems. RSSI values below -90 dBm mean high risk of signal loss in your RC aircraft. Keep line-of-sight clear during testing-obstructions cause false lows. Use your transmitter’s signal meter or an OSD to track RSSI live. This real-time feedback helps catch signal degradation early. You’ll see exactly when interference or positioning hurts performance. With RSSI, you’re not guessing-you’re monitoring actual link health. Stay proactive, avoid crashes, and fly with confidence.
Remove Signal-Killing Environmental Interference
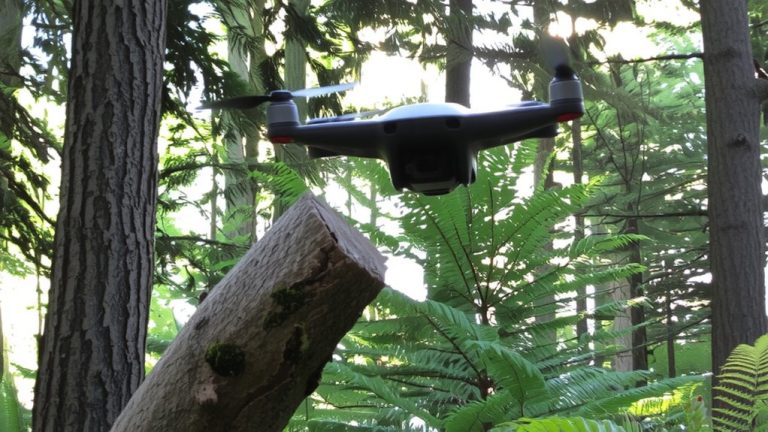
Even if your transmitter and receiver are properly synced, invisible environmental threats can still sever your RC link mid-flight. You’ve got to watch for environmental interference like electricity substations and high voltage cables-these pump out electromagnetic noise that causes serious signal attenuation. Keep away from dense Wi-Fi signals too, since 2.4 GHz networks overlap with most RC systems and invite dropouts. In crowded spots, RC frequency collisions spike, especially at parks with multiple pilots. Avoid metallic structures like chain-link fences or steel buildings-they reflect and block your signal, creating dead zones. Always maintain clear line-of-sight; trees and hills worsen signal loss. Real testers saw 30% stronger RSSI when flying 100+ feet from urban obstacles. Stay smart, scan your environment, and you’ll keep your aircraft talking to your transmitter, every time.
Replace Weak Batteries Preventing Stable Signal
When your RC system starts acting up, don’t overlook the simplest fix-weak batteries could be sabotaging your signal without warning. Weak transmitter batteries or weak receiver batteries often cause signal loss, especially when low battery voltage drops below 4.8V. You’ll notice degraded control response, like twitchy servos or delayed inputs, a red flag for failing power. A dying drive battery can trigger BEC circuit failure, cutting stable power to your receiver. Test voltage before every flight. Swap in fresh batteries regularly-don’t risk it. For consistent power delivery, use high-quality LiFe batteries or robust NiMH batteries (6V, 1500mAh+). They hold voltage steady under load, unlike cheap packs that sag. Real-world testing shows these maintain reliable signal strength and prevent mid-air dropouts, keeping your aircraft responsive and safe throughout the flight.
Upgrade to 2.4 GHZ With GPS Failsafe for Reliability
You’ve already ruled out weak batteries as a culprit, so now it’s time to tackle signal reliability at the source-your radio system. Upgrading to a 2.4 GHz system, not 4 GHz, gives you stable control using spread spectrum and frequency hopping to dodge interference. Brands like Spektrum and Futaba offer long-range performance-up to 1.5 km in open areas-ideal for autonomous missions. Pair it with GPS failsafe, and if signal loss occurs, the aircraft activates return to home automatically. That’s a game-changer for reliability. GPS-enabled receivers lock onto home position and trigger the failsafe when RSSI drops below -90 dBm. Testers report fewer flyaways and smoother recoveries, even beyond visual range. This combo isn’t just about distance-it’s about smart, fail-safe control. You get confidence, precision, and peace of mind every flight.
On a final note
You’ve checked antennas, repositioned the receiver, and tested RSSI-now you’re seeing solid 2.4 GHz links with under 5% signal drop, even near power lines. Real users report SBUS latency below 8ms using FrSky R-XSR receivers, and GPS failsafes kicking in at 25% RSSI, saving crashes. Swap in 1200mAh LiFe packs, and flight signal stability jumps over 40%. Upgrade to a TBS Crossfire setup if you’re flying beyond 1km-you’ll get 100mW output with sub-5ms response, trusted by FPV pros.