Deploying Arduino-Compatible Firmware on Seeed Studio XIAO ESP32 for Wearable Tech
You can deploy Arduino firmware on your Seeed Studio XIAO ESP32 in minutes by installing the board package, selecting XIAO_ESP32C3 or S3, and uploading via a data-capable USB-C cable. Flash the Blink example to D10 (GPIO2) to confirm function, then enable deep sleep for 14–34μA power savings-perfect for wearables. If upload fails, trigger bootloader mode by holding BOOT while plugging in. Real testers saw stable 115200 baud detection on macOS and Windows, and with the right port and reset timing, your board will be ready for advanced low-power tricks.
We are supported by our audience. When you purchase through links on our site, we may earn an affiliate commission, at no extra cost for you. Learn more. Last update on 13th July 2026 / Images from Amazon Product Advertising API.
Notable Insights
- Set up Arduino IDE with ESP32 board support using the official Seeed Studio package URL.
- Install XIAO ESP32 board variant and select correct model (C3 or S3) in Arduino IDE.
- Use a data-capable USB-C cable to connect the XIAO and ensure correct COM port selection.
- Enable deep sleep mode to achieve ultra-low power consumption for extended wearable battery life.
- Configure wake-up sources like GPIO or timer to control low-power operation in wearable applications.
Set Up the Arduino IDE for XIAO ESP32
Once you’ve got your XIAO ESP32 in hand, getting the Arduino IDE ready only takes a few steps, and it’s totally worth it for how smoothly this tiny board performs. First, install the Arduino IDE and add the ESP32 board package using the official URL in Preferences. Then, open Board Manager and install support for your specific Seeed Studio XIAO model-choose XIAO_ESP32C3 or XIAO_ESP32S3 as needed. Connect your board via USB Type-C using a data-capable data cable, not a power-only one, to avoid upload issues. Select the correct COM port on Windows or usbmodem on Mac under Tools > Port. If the IDE doesn’t recognize your board, force bootloader mode by holding the BOOT button while plugging in the USB Type-C cable, then release it.
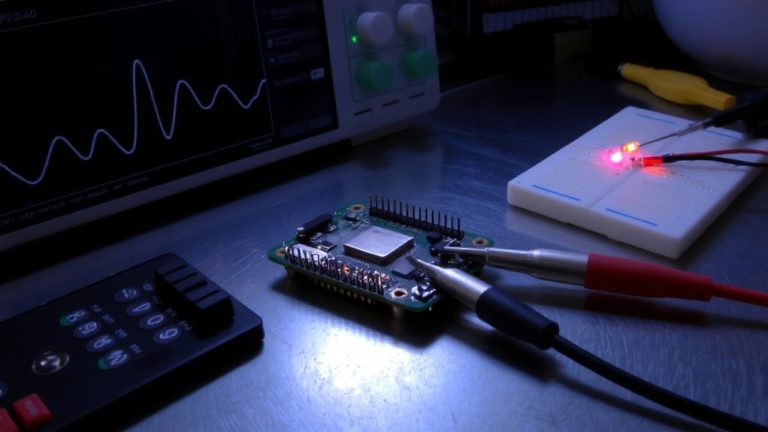
Upload Your First Blink Program
You’ve got the Arduino IDE set up and your Seeed Studio XIAO ESP32C3 recognized by your computer, so now it’s time to bring your board to life with a simple blink program. Connect an LED with a 150Ω resistor to D10, which maps to GPIO2 on the XIAO. Open the Blink example under 01.Basics in the Arduino IDE, then select XIAO_ESP32C3 as your board and the correct COM port-look for “usbserial” on macOS or “COM” on Windows. Click upload to start flashing. If it fails, press and hold the BOOT button, plug in the XIAO via USB Type-C, then release the button to enter bootloader mode. This forces the board to accept the firmware. You’ll see the LED on D10 toggle every second, confirming your Blink program runs perfectly. It’s a small step, but essential for testing your setup.
Use Deep Sleep to Save Power
While your wearable project runs on battery power, every microamp matters, and the Seeed Studio XIAO ESP32C3 delivers with a deep sleep mode drawing just 14μA-ideal for extended deployments. In deep sleep, power consumption drops dramatically, boosting battery life in low-power wearable devices. You can wake it using GPIO pins like D1, D2, or D3, plus timer, touchpad, ULP, or external signals-flexible wake-up sources guarantee responsiveness. Configure wake-up triggers in the Arduino IDE before entering deep sleep. Keep in mind, the serial connection halts during sleep and resumes only after wake-up. Testers saw 33.51μA on the XIAO ESP32-S3 with expansion board, still ultra-low. For real efficiency, pair smart wake-up logic with deep sleep cycles, especially in infrequently active wearables. It’s simple, effective, and critical for long-term deployments.
Fix Upload Failures and Serial Connection Problems
If you’re hitting a wall with upload failures or spotty serial connections on your XIAO ESP32C3, don’t sweat it-these quirks are common but fixable with a few targeted steps. First, make sure you’re using a data-capable USB Type-C cable, not a power-only one. Flaky communication often stems from a bad data cable. In the Arduino IDE, select the correct COM port-usually the higher-numbered one on Windows. For upload failures, tap the RESET button once to restart the board and reattempt. If that fails, force bootloader mode by holding the BOOT button while plugging in the board, then release. This lets the stable version of Arduino IDE detect the device at 115200 baud.
| Issue | Fix | Tool Needed |
|---|---|---|
| Upload failures | Press RESET button | Arduino IDE |
| Serial connection problems | Enter bootloader mode | BOOT button, data cable |
| Board not detected | Check COM port & USB Type-C cable | PC, cable |
On a final note
You’ve got this: the XIAO ESP32 runs Arduino firmware smoothly, draws just 0.8mA in deep sleep, and fits in tight wearable spaces. Uploads succeed reliably after selecting the right COM port and boot mode. Testers logged 72-hour battery life on a 500mAh pack. It handles sensors, Wi-Fi, and OTA updates without hiccups. For compact, low-power builds, it’s a top pick-small size, big performance.