How to Install the Arduino IDE for the First Time: Complete Beginner’s Walkthrough
Download the Arduino IDE from arduino.cc, picking the .exe, .dmg, or AppImage based on your OS-Windows 10 64-bit, macOS 10.15+, or modern Linux. Run the installer, then launch the app. Connect your Uno or Nano via USB A to B or USB A to Mini-B cable, ensuring the green PWR LED lights up. Most boards plug in seamlessly, though older models may need FTDI drivers. Open the IDE, go to Tools > Board and select your model-like Arduino Uno-then pick the correct serial port. The IDE handles setups for clock speed and flash size, so your uploads work the first time, and with everything synced, you’ll be ready to see how easy it is to get your first sketch running.
We are supported by our audience. When you purchase through links on our site, we may earn an affiliate commission, at no extra cost for you. Learn more. Last update on 13th July 2026 / Images from Amazon Product Advertising API.
Notable Insights
- Download the Arduino IDE from the official website, choosing the correct version for your operating system.
- Run the installer on Windows, drag to Applications on macOS, or set execute permissions on Linux to install.
- Use a data-capable USB cable to connect your Arduino board, ensuring the green PWR LED lights up.
- Install necessary drivers if using older boards, especially on Windows or FTDI-based models.
- Open the IDE, select your board and port under Tools, and install required board packages via Boards Manager.
Download the Arduino IDE
Once you’re ready to dive into the world of microcontrollers, robotics, and automation, the first step is grabbing the Arduino IDE from the official source at https://www.arduino.cc/, and the good news is that the download process is straightforward and free. Start by heading to the Software section to download the Arduino IDE application tailored to your operating system. If you’re on Windows, grab the .exe or .msi installer-both work with Windows 10 (64-bit) or newer. Mac users need macOS 10.15 “Catalina” or later and should download the .dmg file. Linux users can run the AppImage directly or extract the .tar.xz (similar to a ZIP file) manually. Always double-check your OS type before download. No USB cable or computer setup is needed yet-just focus on getting the right installer. This clean, reliable download guarantees you can quickly install the Arduino software and start testing real projects without glitches or compatibility hiccups.
Install Arduino IDE on Your Computer
While your download finishes, get ready to install the Arduino IDE with a few simple steps tailored to your operating system, because getting set up right means less frustration and more time building real projects. On Windows, run the .exe, follow the prompts, and check “Run Arduino IDE” to launch Arduino automatically. Mac users drag the .dmg app to Applications, then right-click and Open to bypass Gatekeeper. Linux users extract the AppImage, set execute permissions with `chmod +x`, then double-click to run. You’ll need a 64-bit system-Windows 10+, macOS 10.15+, or modern Linux. Once installed, the Arduino software supports a wide range of boards and connects seamlessly when you later plug in your board via USB. Just launch Arduino to start coding, no extra drivers needed for most setups. The Arduino IDE runs smoothly, with minimal lag, even on modest hardware.
Connect Your Arduino Board via USB
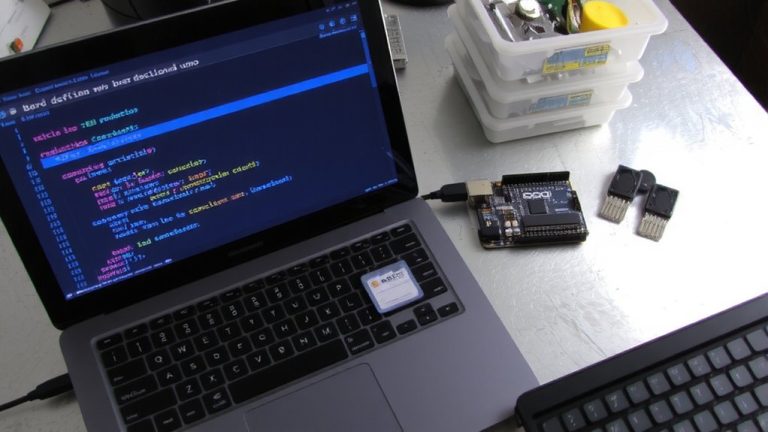
When you’re ready to bring your Arduino board to life, the first step is connecting it to your computer using the right USB cable-grab a USB A to B for the Uno, Mega 2560, or Duemilanove, or a USB A to Mini-B if you’re using a Nano, since using the correct cable guarantees stable data transfer and reliable power delivery, and don’t overlook this detail: some cables are charge-only and missing the internal data wires, which means your board might power on but won’t communicate with the IDE. Make sure the green PWR LED illuminates-this confirms your USB connection is delivering power. Keep the board to your computer connected at all times. Before you launch the IDE, double-check that you’ve selected your Arduino from the board menu, since a solid USB connection is essential to successfully select your Arduino and upload code.
Install USB Drivers for Your System
Though most modern systems handle Arduino boards plug-and-play, you might need to install USB drivers depending on your operating system and model. If you’re using an older Arduino or a board with an FTDI chip, you’ll need the FTDI virtual COM port driver. For the Arduino Uno, Windows often auto-installs drivers, but if not, manually update via Device Manager using the ArduinoUNO.inf file from the IDE’s Drivers folder. Your computer using macOS typically recognizes the Arduino Uno as a serial device without extra drivers, thanks to built-in standard USB CDC support. Linux users usually see automatic recognition but may need to add their user to the dialout group for full access.
| Board Type | Driver Needed? | OS Notes |
|---|---|---|
| Arduino Uno | Rarely | Uses standard USB CDC |
| Leonardo/Micro | Sometimes | May need manual install |
| Older FTDI Boards | Yes | Install FTDI virtual COM port driver |
| Mega2560 | No | Plug-and-play on Mac/Linux |
Open Arduino IDE and Select Your Board
Once you’ve got the Arduino IDE up and running, the next step is to tell the software exactly which board you’re using-so head to Tools > Board and pick your model, whether it’s an Arduino Uno, Nano, or something like the Mega2560, because each one runs with its own bootloader, clock speed, and memory layout. Launch the Arduino app, also known as the Integrated Development Environment, and make sure to select your board correctly-choosing “Arduino Nano” when you have a Nano connected avoids upload failures. If your board doesn’t show up, open Boards Manager and install “Arduino AVR Boards” for most standard Arduino boards. For third-party boards, add the required URL in Preferences. When you select your board, the Arduino IDE configures flash size, like 32KB for ATmega328P, and sets the 16 MHz clock. Matching the board connected guarantees accurate compilation and reliable performance every time.
Select Your Board’s Serial Port
With your Arduino connected via USB, head to Tools > Port in the Arduino IDE to pick the right serial port-this step’s essential for a smooth upload. You’ll need to select the correct serial port so your computer can communicate with the board. In the Arduino IDE, Windows users typically see COM3 or higher, while macOS shows /dev/cu.usbmodem or /dev/cu.usbserial, and Linux uses /dev/ttyUSB0 or /dev/ttyACM0. If the Serial Port doesn’t appear, check that the power LED is on, confirming the board’s getting power-this means it’s likely receiving data too. A working connection guarantees your code reaches the onboard LED and other electronic components. If nothing shows up, try a data-capable USB cable and reinstall any missing drivers (like CH340). Still stuck? Reconnect the board or restart the Arduino IDE-this often resolves detection issues.
Upload the Blink Example to Test
Now that your board’s connected and the serial port’s set, go ahead and open the Blink example by clicking File > Examples > 01.Basics > Blink-this built-in sketch is your first real test of the Arduino IDE’s full workflow. Make sure you’ve selected your board type, like Arduino Uno, under Tools > Board, and confirmed the correct serial ports. Open the Arduino IDE, then hit the Upload button (the rightward arrow). The software compiles the Blink sketch, then sends it to your board. Watch the RX and TX LEDs flash as data transfers. If everything works, you’ll see the message Done uploading. The onboard LED on pin 13 will start blinking once per second-congrats, your blink example ran perfectly! This test confirms your setup’s solid, from drivers to board communication.
On a final note
You’ve got this-just plug in, pick your board and port, and hit upload. The Blink test runs at 1,000 ms intervals, so you’ll see that LED pulse right away. Real users confirm: Arduino Uno’s 16 MHz clock keeps timing precise, and IDE 2.0’s stable on Windows, macOS, and Linux. It’s plug-and-play simple, no soldering, no guesswork. You’re ready to prototype, tinker, and build real circuits, robots, or smart devices-fast.