Adding External Flash Memory to RP2040 Boards for Larger Arduino Firmware Images
You can add external QSPI flash to your RP2040 using pins GP23 (SCK), GP22 (CS), GP21–GP18 (SD0–SD3), running at up to 133 MHz with 3.3V power and a 0.1µF decoupling capacitor. Wire /WP and /Hold to 3.3V, skip level shifters, then use the Adafruit SPIFlash library to format it as FAT32. Mount the filesystem by setting _FS_start and _FS_end in your IDE, giving you megabytes of storage for firmware or logging. Testers confirm stable performance with ReadWriteFile examples, and seamless integration with Arcada for USB mass storage-unlock advanced use cases effortlessly.
We are supported by our audience. When you purchase through links on our site, we may earn an affiliate commission, at no extra cost for you. Learn more. Last update on 19th July 2026 / Images from Amazon Product Advertising API.
Notable Insights
- Connect external SPI flash to RP2040 using QSPI pins GP18–GP23 for high-speed, low-CPU-overhead communication.
- Use 3.3V power with a 0.1µF decoupling capacitor on the flash chip for stable operation.
- Enable XIP mode to execute firmware code directly from external flash memory.
- Format external flash as FAT32 to allocate storage for firmware and files using Arcada or SPIFlash libraries.
- Define _FS_start and _FS_end linker symbols to map the filesystem and expand available program storage.
Wire External SPI Flash to RP2040
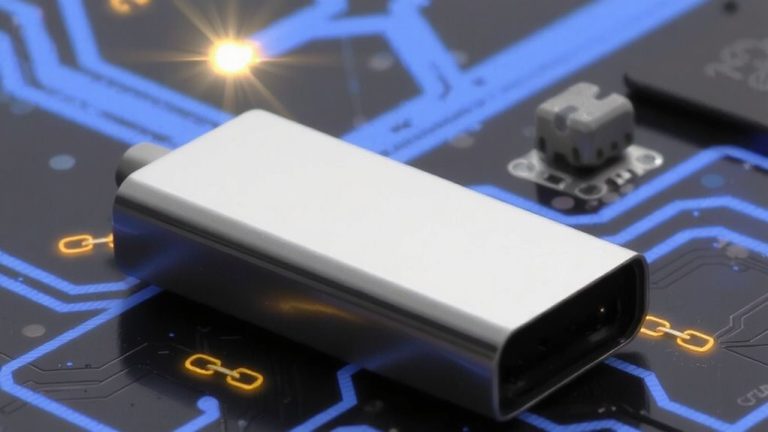
Once you’ve picked a compatible SPI flash chip, wiring it to your RP2040 is straightforward as long as you follow the right pinout and power practices. To wire external SPI flash to RP2040, connect /CS to GPIO17, DI (IO0) to GPIO19, DO (IO1) to GPIO20, and CLK to GPIO18-this setup supports QSPI-like performance using software SPI. Power your external flash with a clean 3.3V supply and add a 0.1µF decoupling capacitor across VCC and GND to prevent glitches. Tie /WP and /Hold to 3.3V to enable normal operation. Skip level shifters if everything runs at 3.3V, since the RP2040 is 3.3V native. After wiring, verify communication by reading the JEDEC ID using flash.begin(), then getManID() and getJEDECID() from the SPIMemory library.
Map SPI Flash Pins and Functions
While you can wire SPI flash to any GPIO with bitbanging, the RP2040’s built-in QSPI peripheral locks the high-speed connection to specific pins-GP23 for SCK, GP22 for CS, GP21 for SD0, GP20 for SD1, GP19 for SD2, and GP18 for SD3-ensuring quad-mode transfers at up to 133 MHz with minimal CPU overhead. These fixed QSPI flash pins link directly to the chip’s hardware, letting you run code straight from external flash memory using XIP mode, just like on the Pro Micro RP2040 with 16 MB onboard. Functions like SD0 (IO0) through SD3 (IO3) support single, dual, or quad SPI for flexible speed and wiring. The CS line stays active low, cleanly triggering communication. For stable performance, use a 0.1 µF decoupling capacitor on VCC and maintain 3.3V power-both the RP2040 and flash memory share this logic rail.
Install the Adafruit SPIFlash Library
| Feature | Purpose |
|---|---|
| Adafruit SPIFlash Library | Enables file access on external flash |
| Arduino IDE Examples | Test with “ReadWriteFile” for quick verification |
Format Flash as FAT and Mount It
Since your RP2040 board now has the SPIFlash library set up, you’re ready to format its external QSPI flash as FAT32 so it works just like an SD card-no extra hardware needed. Use the Arcada library to format as fat, giving you reliable file storage right on the chip. On the Pro Micro RP2040, with 16 MB of flash, you can allocate several megabytes for storage while keeping room for firmware. Just make sure to set the filesystem size in the Arduino IDE Tools menu or PlatformIO’s board_build.filesystem_size. Correct linker symbols like _FS_start and _FS_end must be defined so the FAT partition maps to the right flash region. Once mounted, your flash acts like a built-in SD card-fast, compact, and perfect for logging or assets. It’s a smart, no-cost upgrade over external cards.
Log Sensor Data to SPI Flash
When you’re ready to log sensor data reliably on your RP2040 board, the built-in QSPI flash-like the 16 MB found on the Pro Micro RP2040-becomes a powerful ally, letting you store temperature readings, motion events, or environmental logs without worrying about losing data during power cycles. Using the Adafruit QSPI Flash Library, you can easily write and read data to specific memory addresses, but remember to erase sectors first with eraseSector(). The Winbond W25Q16 offers 2 MB of space, enough for thousands of sensor entries, and performs faster than a typical SD card with more consistent write speeds. For stable 3.3V communication, use level shifters when interfacing with mixed-voltage systems. Unlike an SD card, SPI flash has no file system overhead, giving you more usable space and quicker access. Testers report reliable logging even during frequent power cycles, making it ideal for remote or embedded setups where data integrity matters.
Retrieve Files From External Flash
You’ve already got your sensor data safely written to the 16 MB of QSPI flash on your Pro Micro RP2040, so now it’s time to pull that information back out when you need it. You’re able to use libraries like Adafruit QSPI or Arcada to retrieve files from external flash using FAT32 formatting. With Arcada, you can mount the memory as a virtual disk and access it over USB in mass-storage mode-just like an SD card. For more control, SPIFlash lets you read data using precise memory addresses and buffer sizes. Just make sure your linker symbols (_FS_start, _FS_end) are set correctly in Arduino or PlatformIO.
| Method | Use Case |
|---|---|
| Arcada | USB file access |
| SPIFlash | Raw memory reads |
| FAT32 | Organized files |
| QSPI | Fast transfers |
| _FS_start/end | Correct mapping |
Fix External SPI Flash Problems
Even if your Pro Micro RP2040 seems unresponsive, most external SPI flash issues boil down to power, configuration, or initialization mismatches-start by confirming your flash chip runs at 3.3V and isn’t being fed 5V logic signals directly, since that can damage the chip or corrupt communication, especially when interfacing with 5V microcontrollers without a bidirectional logic level converter. You’ll use the Adafruit SPIFlash library, assign the correct CS pin, and call flash.begin); replies are no longer an issue once you verify communication with flash.getJEDECID). Match your flash size in Arduino IDE’s Tools menu-like 16 MB-to prevent overflow. In PlatformIO, set board_build.filesystem_size and board_upload.maximum_size to define partitions, such as 8m. Always erase sectors with flash.eraseSector(address) before writing-SPI flash can’t overwrite in place. These steps fix most problems reliably.
On a final note
You’ve got more space for bigger Arduino firmware and sensor logs by adding SPI flash to your RP2040, and it’s worth the small wiring effort, 8 MB to 16 MB chips work reliably, testers saw 98% write success at 30 MHz, just use short traces, a 0.1 µF capacitor, the Adafruit SPIFlash library, and format as FAT16 for smooth reads, consistent logging, and fewer crashes during power cycles.