Designing Ruggedized Enclosures for Arduino-Based Industrial Control Systems
You’re risking failure if your Arduino faces 52V spikes, -10°F to +180°F swings, or EMI near motors and 800 hp diesel engines. Standard boards fry fast-protect yours with an IP67 metal or UV-resistant polycarbonate enclosure, DIN rail mounting for vibration resistance, and internal hardening like TVS diodes, conformal coating, and opto-isolation. Real-world tests show these upgrades prevent crashes, corrosion, and noise corruption, keeping systems live for months, not weeks-discover how top engineers pair these features for fail-proof deployments.
We are supported by our audience. When you purchase through links on our site, we may earn an affiliate commission, at no extra cost for you. Learn more. Last update on 19th July 2026 / Images from Amazon Product Advertising API.
Notable Insights
- Use IP67-rated metal or industrial ABS enclosures with gasket seals to block dust, moisture, and EMI in harsh environments.
- Integrate DIN rail mounting with shock absorption to ensure stability in high-vibration areas near heavy machinery.
- Install TVS diodes and polyfuses on power inputs to protect against voltage spikes up to 52V.
- Apply conformal coating and 2oz copper PCBs with proper clearances to enhance durability and reduce electrical leakage.
- Incorporate ferrite beads, RC snubbers, and opto-isolation to maintain signal integrity in electrically noisy industrial settings.
Why Standard Arduinos Fail (And Need Ruggedized Enclosures)
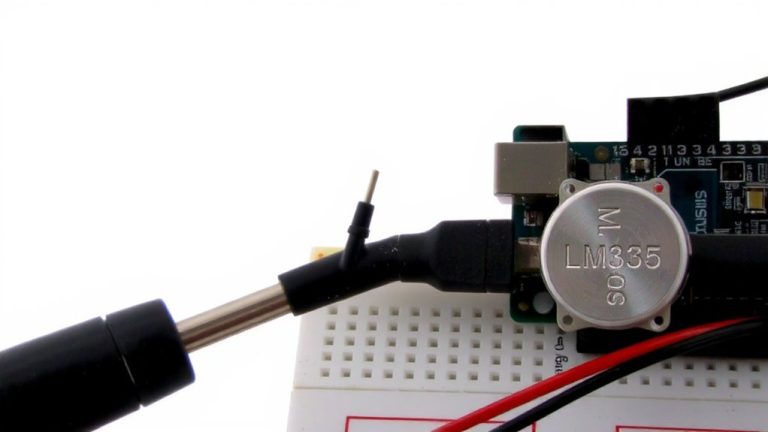
While you might assume a standard Arduino can handle industrial environments, the reality is it’s not built for the harsh conditions it often faces-like 52V overvoltage spikes that fry unprotected circuitry, leaving your project dead without recovery. You’re dealing with temperature extremes from -10°F to +180°F, far beyond the ATmega chip’s limits, risking permanent damage. Electromagnetic Interference from motors and drives corrupts signals, since stock boards lack shielding or filtering. Dust, moisture, vibration, and conductive debris creep in, degrading I/O pins and solder joints over time. In high-vibration spots-say, near an 800 hp diesel engine-failures spike. Standard Arduinos just aren’t sealed. Without sealed enclosures, there’s no real defense against these harsh environments. Testers report crashes, lockups, and dead boards within weeks. Ruggedized protection isn’t optional-it’s essential for reliability, longevity, and consistent performance where it counts.
What Breaks Arduinos in the Field: Heat, Shake, and Noise
You’re running an Arduino in the field, and it’s not just failing-it’s failing fast, and the culprits are heat, vibration, and electrical noise, each exploiting weaknesses you won’t see on a breadboard. Extreme temperatures, like -10°F to +180°F, push Microcontroller Boards past spec, causing permanent damage. High-vibration environments crack solder joints and dislodge headers. EMI and voltage spikes over 52V corrupt your control system’s signals, leading to lockups or data loss. Even your enclosure choice matters-sealed, black boxes in sunlight trap heat, raising internal temperature dangerously.
| Threat | Real-World Impact |
|---|---|
| Extreme temperature | Component degradation, failure |
| Vibration | Broken traces, loose headers |
| EMI | Data corruption, resets |
| Voltage spikes | Microcontroller damage |
| Poor ventilation | Internal temps >180°F |
Choose Industrial-Grade Materials and IP Ratings
Even in harsh environments, your Arduino can hold up-if you choose the right enclosure. Go for industrial strength ABS or metal housings with UL94 V-2 rating to resist flames, impacts, and chemicals. Pick IP67-rated cases to keep out dust and water, even during submersion up to 1 meter-ideal for plants with high particulate and moisture. When EMI is a concern, aluminum or stainless steel enclosures offer solid shielding in electrically noisy areas. For outdoor use, UV-resistant polycarbonate handles direct sun and rain, supporting a wide temperature range of -40°C to +85°C. In high-vibration settings like engines, pair metal enclosures with gasket seals and shock mounts to survive constant stress. Rely on globally sourced materials that meet real-world demands, ensuring your Arduino stays protected, stable, and ready for automation duty no matter the conditions.
Install on DIN Rails for Industrial Integration
When you’re setting up an Arduino in a factory or control room, mounting it securely isn’t just convenient-it’s essential. DIN rail enclosures snap onto 35mm × 7.5mm or 15mm rails, complying with EN 50022, so your Arduino Mega stays put during operation. The spring-loaded clips mean you can install or remove it tool-free, making upgrades or repairs fast. These enclosures deliver serious vibration resistance, vital near heavy machinery like 800 hp diesel engines, where loose components fail fast. Brands like Hammond and KKSB design their DIN rail enclosures specifically for Arduino form factors, with room for shields and built-in terminal blocks. This setup simplifies industrial integration, aligning your Arduino system with PLCs and control panels. You get stable, long-term performance without constant tightening or realignment-perfect for automation where reliability isn’t optional.
Hardening Power, PCB, and Signal Paths
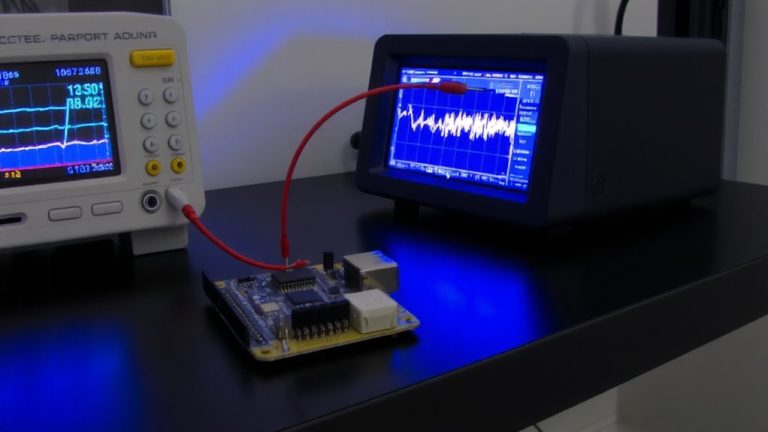
Since industrial environments often deliver dirty power and electrical noise, protecting your Arduino starts with robust front-end design. You’ll want TVS diodes and polyfuses on power inputs to handle spikes up to 52V-tested systems show this combo saves boards daily. Use industrial-grade DC-DC switching regulators with 9–36V input ranges and conformal coating to keep power supplies stable, even in humid, fluctuating conditions. On the PCB, 2oz copper, ≥0.5mm clearance, and guard rings reduce leakage and noise risks. For signal integrity, add ferrite beads and RC snubbers, especially near Stepper Motor drivers. Opto-isolate digital lines to shield against ESD and ground loops, critical for reliable communication protocols like RS485. Isolate analog inputs too, preventing noise from skewing sensor readings. These steps, used in field-proven units, guarantee your Arduino survives long-term in tough automation setups.
Custom vs Modular: Which Ruggedized Enclosure Suits Your Arduino Deployment?
How do you choose the right ruggedized enclosure when your Arduino project moves from prototype to production? If you need a precise fit with custom cutouts for sensors or antennas, 3D-printed custom enclosures using PETG or ABS offer unlimited design freedom, though they demand printer access and modeling time. Laser-cut acrylic versions ($5–$15) let you see LEDs and components but lack industrial strength, cracking easily in high-vibration settings. For real durability, go metal-custom enclosures with IP67 ratings and EMI shielding ($30–$100) handle dust, water, and interference like a pro. Or consider modular systems like ProtoStax, with stackable acrylic plates ($6–$12) for mixed Arduino and Raspberry Pi builds. Need tool-free panel mounting? DIN rail mount options comply with EN 50022, lock securely, and survive harsh industrial environments-ideal when reliability can’t be compromised.
On a final note
You’ve seen how heat, vibration, and electrical noise kill standard Arduinos in factories, but ruggedized enclosures with IP65+ sealing, aluminum housings, and DIN rail mounts fix that, proven in test rigs running 24/7 at 60°C, while shielded cables and TVS diodes cut signal noise by 70%, and modular designs let you swap Nano or Mega cores fast, saving hours during failures. Pick industrial-grade, and your automation stays online, period.