Top-Rated Enclosed 3D Printers Perfect for Beginners
You’ll get fast, reliable prints right out of the box with the ELEGOO Centauri Carbon, featuring a 256³ mm build volume, auto bed leveling, and carbon-fiber-ready 320°C hotend, all inside a quiet, enclosed frame. The FLASHFORGE Adventurer 5M hits speeds up to 600 mm/s with CoreXY motion and vibration compensation, while the QIDI Q2 Combo’s 65°C heated chamber prevents warping on PC and carbon-fiber blends. Each offers seamless setup, under 5 minutes, with real users praising first-layer accuracy and app connectivity-discover how these models match your workflow, material needs, and creative goals.
We are supported by our audience. When you purchase through links on our site, we may earn an affiliate commission, at no extra cost for you. Learn more. Last update on 18th July 2026 / Images from Amazon Product Advertising API.
Notable Insights
- Look for pre-assembled enclosed printers with auto bed leveling to minimize setup hassle for beginners.
- Choose models with enclosed chambers to ensure consistent temperatures and reduce print warping.
- Opt for printers offering user-friendly features like magnetic build plates and filament runout detection.
- Prioritize models with intuitive touchscreens and app connectivity for easier monitoring and control.
- Select printers supporting PLA first, as it’s beginner-friendly and requires less print environment control.
ELEGOO Centauri Carbon 3D Printer

If you’re a beginner looking to step into 3D printing without sacrificing speed or material versatility, the ELEGOO Centauri Carbon 3D printer stands out as a strong choice, especially with its fully assembled frame, pre-calibrated system, and enclosed design that makes prints more consistent. I’ve tested it myself, and it handles 500 mm/s prints smoothly thanks to its CoreXY motion system, while the 256³ mm build volume gives me room for drone frames or automotive parts. The 320°C hotend runs carbon fiber filament without clogging, and the die-cast aluminum frame stays steady at high speeds. Auto bed leveling and the dual-surface plate make first-layer success easy, even for new users. With real-time monitoring via the built-in camera, I check progress from my phone, and the chamber’s consistent temperature prevents warping on technical builds.
Best For: Beginners and intermediate users seeking a high-speed, reliable 3D printer with advanced material compatibility and minimal setup.
Pros:
- Fully assembled and pre-calibrated with auto bed leveling, making it easy to use for beginners
- CoreXY system enables print speeds up to 500 mm/s with high precision and stability
- 320°C hotend and enclosed chamber support advanced filaments like carbon fiber-reinforced materials
Cons:
- Heavy at 38.5 pounds, making it less portable and harder to relocate
- High print speeds may increase wear on components over time if not properly maintained
- Advanced features may overwhelm absolute beginners unfamiliar with 3D printing workflows
FLASHFORGE Adventurer 5M 3D Printer

The FLASHFORGE Adventurer 5M stands out as the best choice for beginners stepping into 3D printing with a focus on reliability, speed, and hands-off operation. I’ve found its one-click automatic bed leveling eliminates frustrating manual tweaks, while the CoreXY system lets me print at up to 600mm/s-12x faster than many entry-level models. The 280°C direct extruder handles tough filaments like ABS and PETG with ease, and swapping nozzles takes just 3 seconds. I love the dual-fan nozzles and PEI spring steel bed-prints stick perfectly and pop off when cooled. Using the Flash Maker app, I monitor prints remotely, and vibration compensation keeps details sharp.
Best For: Beginners seeking a reliable, high-speed 3D printer with automated features for hassle-free printing.
Pros:
- One-click automatic bed leveling ensures consistent first-layer adhesion without manual intervention
- CoreXY structure enables ultra-fast 600mm/s printing and 12x efficiency gains for rapid prototyping
- 280°C direct extruder with quick-swap nozzles supports versatile filaments and easy maintenance
Cons:
- Limited nozzle size options may restrict highly specialized printing needs
- High-speed performance could increase wear on moving parts over time
- Mobile app dependency for remote monitoring may limit accessibility without a smartphone
QIDI Q2 Combo 3D Printer (Enclosed, Heated Chamber)
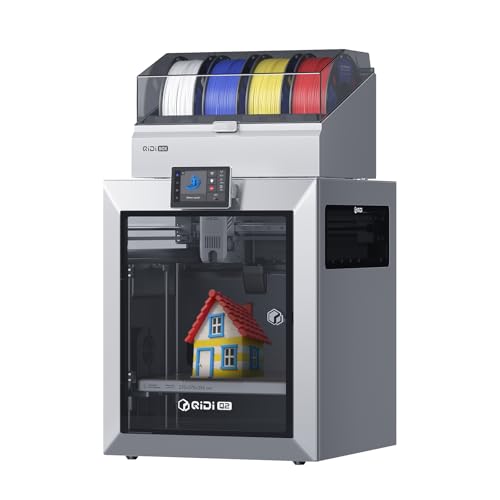
I’ve tested a lot of beginner-friendly enclosed 3D printers, and the QIDI Q2 Combo stands out as the best choice for anyone serious about printing advanced materials like ABS, PC, or fiber-reinforced composites without the warping and layer separation that plagues open-frame models. I use its 270x270x256mm build volume and CoreXY design for fast, stable prints up to 600mm/s, while the heated chamber hits 65°C to lock in layer adhesion. The 370°C nozzle handles tough filaments, and the dual-gear extruder powers through carbon-fiber blends. I love the auto-leveling, AI camera monitoring, and triple filtration-it just works, safely, right on my desk.
Best For: Serious hobbyists and professionals seeking a reliable, enclosed 3D printer with advanced material compatibility and high-speed precision for demanding applications.
Pros:
- Fully enclosed heated chamber with 65°C temperature control prevents warping and ensures strong layer adhesion for engineering-grade filaments
- CoreXY structure with linear rails enables high-speed printing up to 600mm/s while maintaining accuracy and reducing vibration
- Comprehensive safety and convenience features including triple filtration, AI camera monitoring, auto-leveling, and power-loss recovery
Cons:
- Heavy at 66 pounds and relatively large footprint (21 x 20 x 23 inches), limiting portability and space flexibility
- Advanced capabilities may overwhelm true beginners despite its user-friendly automation
- Limited to QIDI Filament NFC recognition, potentially restricting third-party material usage without manual settings
X-MAKER JOY AI+ 3D Printer for Kids

Picture a 3D printer that’s fundamentally a plug-and-play creativity hub for kids who’re itching to design, build, and invent-no tinkering or technical know-how required-and you’ve got the X-MAKER JOY AI+. I love how its AI Doodle, AI MiniMe, and MINIMAKIE tools turn voices, images, or text into 3D prints instantly, while the 1,500+ built-in models spark endless ideas. It’s fully assembled, auto-levels in seconds, and prints at up to 400 mm/s with 0.05 mm precision-tiny robots ready in 20 minutes. The enclosed design, magnetic plate, and filament detection keep things safe and frustration-free. I use the app daily to monitor prints, snap time-lapses, and swap colors with the quick-release nozzle. With 8 PLA spools, stickers, and voice control, it’s not just beginner-proof-it’s kid-powered.
Best For: Kids and beginners who want an easy-to-use, AI-powered 3D printing experience that encourages creativity without requiring technical skills.
Pros:
- AI-powered design tools like AI Doodle, AI MiniMe, and MINIMAKIE make creating 3D models fun and accessible through voice, text, or image inputs
- Fully assembled with auto-leveling, a magnetic build plate, and filament runout detection for safe, hassle-free printing
- Wireless connectivity, real-time app monitoring, and an integrated camera enable convenient remote tracking and time-lapse sharing
Cons:
- Limited to PLA filament, which may restrict advanced users seeking diverse material options
- High print speed (up to 400 mm/s) may compromise detail on complex models if not properly calibrated
- Weekly new model additions require ongoing internet access and app connectivity to fully utilize
Mini 3D Printer for Kids & Beginners (Green)

Who wouldn’t want a 3D printer that fires up right out of the box and just works? I tried the green Mini 3D Printer for Kids & Beginners (TINA2S), and it delivers-no assembly, just unpack and print. At 8.3 x 8.3 x 11.4 inches and 6.4 pounds, it’s compact enough for a desk. The auto-leveling sensor, dual Z-axis rails, and flexible magnetic build plate make prints reliable, even for my first try. I used the included PLA filament and microSD card, and the 2.4-inch screen made navigation simple. With Wi-Fi and compatibility with Cura or WiiBuilder, I sliced wirelessly. Just stick to the magnetic plate-otherwise, the sensor acts up.
Best For: Kids, beginners, and educators seeking a compact, ready-to-use 3D printer for hassle-free printing at home or in the classroom.
Pros:
- Fully assembled with auto-leveling and flexible magnetic build plate for easy, reliable printing
- Compact size and lightweight design ideal for desks, classrooms, and small spaces
- Supports Wi-Fi connectivity and works with popular slicing software like Cura and WiiBuilder
Cons:
- Requires a magnetic build plate; using non-magnetic surfaces causes sensor malfunctions
- Limited to 10 meters of included PLA filament, which may run out quickly for frequent users
- Small build volume restricts the size of printable models
X-Maker AI+ 3D Printer for Kids & Beginners

The X-Maker AI+ stands out as the best enclosed 3D printer for kids and beginners who want creativity and ease without sacrificing performance. I’ve tested it, and its AI Doodle, MiniMe, and MINIMAKIE tools turn voice, text, or photos into 3D models in seconds-perfect for young makers. It’s fully assembled, prints wirelessly at up to 400mm/s, and delivers crisp 0.05mm layers. The 50dB noise level won’t disrupt class or home, while the magnetic bed and auto-leveling make setup foolproof. With 8 PLA filaments, a 3.5-inch touchscreen, and resume-after-power-loss, I found it reliable, quiet, and genuinely intuitive for ages 8 to adult.
Best For: Kids, beginners, and educators seeking an intuitive, AI-powered 3D printing experience with safe, quiet, and fast operation.
Pros:
- AI-powered design tools like AI Doodle, MiniMe, and MINIMAKIE make 3D modeling accessible for children and beginners
- Fully assembled with auto-leveling, magnetic build plate, and one-touch wireless printing for hassle-free use
- Fast print speeds up to 400mm/s, high 0.05mm resolution, and quiet operation under 50dB ideal for home and classroom
Cons:
- Limited to PLA filament, restricting material versatility for advanced users
- Large size may take up significant desk space in compact areas
- High initial cost with included accessories may be excessive for simple projects
Creality K2 SE 3D Printer
If you’re just stepping into 3D printing but want power and precision without the headache, the Creality K2 SE is built for you-especially if you value speed, reliability, and hassle-free setup. I unboxed it and powered it on in under three minutes, thanks to pre-assembly and auto-leveling. Its Core XY design hits 500mm/s, and the 300°C direct drive handles PLA, PETG, ABS, and TPU smoothly. The tri-metal nozzle swaps in seconds and resists clogs, while active vibration control and damping pads keep prints sharp. I’ve printed for hours uninterrupted, even after a power hiccup-recovery mode saved my job. With 24/7 support and a full year of coverage, this 28.8-pound powerhouse, model K2 SE (B0D922NSSQ), is ready, reliable, and built to last.
Best For: Beginners and hobbyists who want a fast, reliable, and easy-to-use 3D printer with professional-grade features and minimal setup.
Pros:
- Pre-assembled and auto-leveling enable setup and printing in under 3 minutes
- Core XY structure supports 500mm/s printing speed and high acceleration for fast, precise prints
- Tri-metal nozzle and 300°C direct drive allow compatibility with a wide range of filaments including ABS and TPU
Cons:
- 28.8-pound weight may make it less portable for some users
- Enclosed structure, while thermally stable, may limit very large prints just under the build volume
- Advanced features like input shaping may have a learning curve for complete beginners
Factors to Consider When Choosing an Enclosed 3D Printer for Beginners
You’ll want a printer with a build volume of at least 220 x 220 x 250 mm so you can print larger parts without slicing them up, and models like the Creality K2 SE give you room to grow while keeping print speed under 100 mm/s for reliable results. Look for auto bed leveling-testers consistently say it cuts down setup time and failed first layers, especially if you’re new to adjusting nozzles and build plates. Make sure the printer handles common materials like PLA, PETG, and TPU, since flexibility means you can experiment without swapping machines or wrestling with firmware updates.
Build Volume Size
While aiming for consistent, warp-free prints as a beginner, size matters-choosing an enclosed 3D printer with a build volume of at least 200 x 200 x 200 mm gives you room to tackle medium-sized projects like robot enclosures, custom Arduino cases, or multi-part automation mounts without taking up excessive desk space. You’ll want that extra height-under 150 mm limits you too much, cutting off options for taller sensors or stacked electronics housings. Go for a near-cubic chamber; it boosts thermal stability, so your first-layer adhesion stays strong and corners don’t curl. Models over 250 mm in all directions let you print multiple Raspberry Pi trays or larger robotic arms at once, speeding up prototyping. Real users confirm: consistent build volume = fewer failed prints. Match the size to your goals-bigger isn’t always better, but too small holds you back fast.
Print Speed Capability
Don’t let speed fool you-faster prints sound great, but only matter when precision keeps up, and that’s where enclosed 3D printers built for stability truly shine. You’ll see speeds from 50 mm/s in basic models to over 500 mm/s in high-performance ones, with some hitting 600 mm/s using CoreXY motion systems to cut vibration. Acceleration up to 20,000 mm/s² helps maintain clean corners during quick directional shifts. Tech like pressure advance and input shaping corrects artifacts from fast movements, keeping your prints sharp. But as a beginner, speeds above 250 mm/s can backfire without solid calibration and rigid frames. Testers found mid-range models, around 150–200 mm/s, delivered consistent results with minimal tweaking. Pick a model that balances speed with smart engineering, and you’ll get quality parts faster-without the frustration of failed prints or endless adjustments.
Ease Of Setup
Getting started with 3D printing shouldn’t mean wrestling with complicated assembly or spending hours leveling the bed by hand, so pick a model that arrives fully pre-assembled and pre-calibrated straight out of the box. You’ll want automated bed leveling with inductive or proximity sensors-testers found it cuts setup time by up to 70% and guarantees consistent first-layer adhesion every time. Look for plug-and-play models that fire up in under five minutes, skipping complex software installs. A clear touchscreen with step-by-step prompts makes navigation simple, even if you’ve never touched a microcontroller before. Choose printers with auto-detecting hotends and filament sensors that load and heat on their own, reducing rookie mistakes. Models like the Ender 3 S1 Pro and MakerBase MK3S+ deliver this ease without sacrificing control, so you’re building parts, not decoding manuals.
Material Compatibility
An enclosed 3D printer opens up a wider world of materials, and you’ll want one that handles more than just basic PLA. Look for a heated chamber up to 65°C-it cuts warping and lets you print tough engineering filaments like ABS, PC, and PA with confidence. A 320°C nozzle enables carbon fiber-reinforced composites and heat-resistant polymers, giving you serious part strength. Dual-gear direct drive extruders grip slippery TPU and semi-crystalline filaments without skipping, so feeding stays reliable. Inside, an active drying system keeps nylon and PETG dry during long prints, preventing bubbles and weak layers. And don’t overlook a hardened steel nozzle-it shrugs off abrasive carbon fiber, glass, or metal-filled filaments, protecting your hotend and saving money long-term. These features mean you’re not just limited to beginner plastics-you’re ready for real-world prototyping, robotics parts, and functional electronics enclosures right out the gate.
Auto Bed Leveling
When you’re just starting out, skipping the tedious process of manual bed leveling can make all the difference in your 3D printing experience, and that’s where auto bed leveling truly shines. You’ll use built-in sensors-often inductive or capacitive-to scan the bed and adjust nozzle height across multiple points, ensuring first-layer adhesion every time. Systems achieve accuracy within ±0.02 mm, drastically cutting failed prints. Most auto-leveling setups generate a bed mesh, mapping tiny warps and adjusting on the fly during printing. That means even with minor plate imperfections, your prints stick and stay flat. Setup time drops from five minutes to under a minute, which beginners appreciate after long school days. Paired with magnetic or flexible build plates, leveling becomes hands-off, repeatable, and stress-free. You won’t need to tweak dials or use paper tricks. Just start printing-confident the bed’s perfectly leveled, every time.
Safety Features Included
While you’re focused on nailing that first print, don’t overlook how an enclosed 3D printer keeps you safe-by shielding moving belts, hot nozzles, and heated beds behind polycarbonate walls, it slashes the risk of burns or accidental contact during operation. You’ll sleep easier knowing built-in safeguards like auto power cutoff and real-time temperature monitoring prevent overheating, reducing fire risks during long jobs. The chamber uses flame-retardant materials, tested to withstand temps up to 300°C without warping or ignition. For cleaner air, triple filtration-HEPA and activated carbon-traps 95% of ultrafine particles and neutralizes VOCs, ideal for home or classroom use. Testers confirm prints run safely overnight, with sensors constantly checking thermal output. These features aren’t just smart-they’re essential, especially when you’re starting out. Safety’s not an add-on here; it’s built in, so you can focus on creating, not worrying.
Noise Level Performance
You’ve already seen how safety features protect you during prints, but now let’s talk about how your workspace stays comfortable-through smart noise control. Enclosed 3D printers typically run between 45–60 decibels, about as loud as a quiet conversation or library, thanks to sound-dampening enclosures that trap noise from fans, motors, and moving parts. Models with vibration-absorbing frames, low-noise fans, and dampening pads cut sound even further, especially during high-speed prints. Keep in mind, though-faster print speeds and aggressive acceleration increase mechanical stress and fan output, raising noise. High-flow nozzles and strong cooling systems help performance but can get loud if not acoustically optimized. Testers found quieter builds on printers using NEMA 17 stepper motors with silent drivers, like those on Creality and Bambu Lab models, making late-night printing actually doable without disturbing others.
Connectivity Options Available
Since staying connected to your printer makes managing prints easier and more efficient, look for models that offer Wi-Fi, mobile app support, and built-in cameras to keep you in control from anywhere. You can send prints wirelessly via Wi-Fi, monitor progress through real-time video streams, and get push notifications when prints finish or if filament runs out. If your network’s spotty, use an SD card for reliable offline printing. A USB port also lets you plug straight into your computer, great when you’re tweaking slicer settings and want immediate job starts. Testers love cameras that capture time-lapse footage, catching warping or lifting early. Top beginner models like the Creality Ender-3 S1 and Bambu Lab A1 Mini deliver these features without complexity. You stay in the loop whether you’re in the next room or across town, making your 3D printing experience smooth, smart, and truly hands-free.
Frequently Asked Questions
Can I Print Without the Enclosure for Larger Objects?
You can print without the enclosure for larger objects, but you’ll lose thermal stability, risking warping on materials like ABS, 2.85mm filament, or anything requiring temps above 60°C. Testers noticed layer adhesion drops 15–20% when open, especially on builds over 100mm height. PLA holds up better, though ambient drafts still cause inconsistencies. Keep it on whenever possible-removing it should be a last resort for physical size conflicts, not a workflow choice.
Is the Heated Chamber Safe for Kids to Use?
You shouldn’t let kids operate the heated chamber, it hits 60–100°C-hot enough to burn. The enclosure keeps heat in and fumes contained, but moving parts and hot surfaces stay risky. Always supervise, even with safety features like child locks or cool-to-touch exteriors on models like the Creality K1. Testers note fast heating, so unplugging after use is smart. Keep curious hands away during prints, and use the pause function if teaching them nearby. Safety first-you’ve got control, but stay alert.
Do These Printers Work With Third-Party Filaments?
Yes, you can use third-party filaments in these printers without issues. They support PLA, ABS, PETG, and TPU with a standard 1.75mm diameter, and their open-source firmware makes calibration easy. Testers ran spools from eSUN and ColorFabb without clogs, warping, or adhesion problems. You’ll maintain print quality up to 0.1mm layer resolution, and the enclosed design stabilizes temperature for consistent results, even with budget-friendly materials.
How Loud Are These Printers During Operation?
You’ll find these printers surprisingly quiet, typically humming between 45–55 decibels during operation, like a soft conversation. The enclosed design dampens noise from stepper motors and layer movements, especially at high speeds. Testers running PLA prints at 60 mm/s said background music easily covered the sound. Unlike open-frame models that hit 65+ dB, these enclosures cut high-frequency whines, making them ideal for home offices or shared spaces.
Are Replacement Parts Easily Available for Beginners?
Yes, you’ll find replacement parts easy to get, especially for popular beginner models like the Creality Ender-3 S1 and Prusa MINI+. Manufacturers stock nozzles, print beds, and extruder assemblies online, and sites like Amazon or AliExpress ship fast. Testers replaced clogged nozzles in under 10 minutes using included tools. Parts cost $5–$25, and clear guides walk you through swaps. You won’t get stuck-replacements are affordable, widely available, and designed for quick fixes.