Operating Servo Motors With Arduino’s Servo.H Library for Angular Precision
You control servo position by sending 50 Hz PWM signals via Arduino’s Servo.h library, where 1 ms pulses typically equal 0° and 2 ms equal 180°, but real-world tests show SG90 servos often need 544–2400μs for full range. Connect power and signal correctly-use thick wires, external 5V supplies for multiple servos, and always share a common ground. Calibrate with attach(pin, min, max) for precision, and add a 1000μF capacitor to prevent resets from current spikes. You’ll get smooth, accurate motion every time-especially when fine-tuning matches your servo’s true limits.
We are supported by our audience. When you purchase through links on our site, we may earn an affiliate commission, at no extra cost for you. Learn more. Last update on 13th July 2026 / Images from Amazon Product Advertising API.
Notable Insights
- Use the Servo.h library to control servo angles with `myservo.write(0–180)` for precise degree-based positioning.
- Connect the servo’s signal wire to a PWM-capable Arduino pin and ensure proper power and ground wiring.
- Power servos externally for high-current models to prevent Arduino voltage drops and instability.
- Calibrate pulse widths using `attach(pin, min, max)` to match servo-specific limits for full 0°–180° range.
- Maintain a common ground between Arduino and external power supply for reliable signal transmission.
How Servos Know Where to Move: PWM Explained
While you don’t need to be an engineer to get a servo moving, understanding how PWM works will help you use it right. Servo motors work by reading Pulse Width Modulation (PWM) signals sent as control signals every 20 ms at 50 Hz. The width of the pulse-typically between 1 ms and 2 ms-determines the angle of the servo. A 1 ms pulse sets 0°, 1.5 ms hits 90°, and 2 ms reaches 180°, with the pulse width directly setting the angular position. Inside, a control circuit compares the PWM output to feedback from the shaft’s potentiometer, correcting the position of the servo as needed. The Arduino Servo.h library simplifies this, mapping write() commands to precise pulse widths-like 600 µs to 2300 µs-though some servos, like the SG90 or MG996R, may need 544 µs or 2400 µs for full range.
Wiring Your Servo to Arduino for Stable Operation
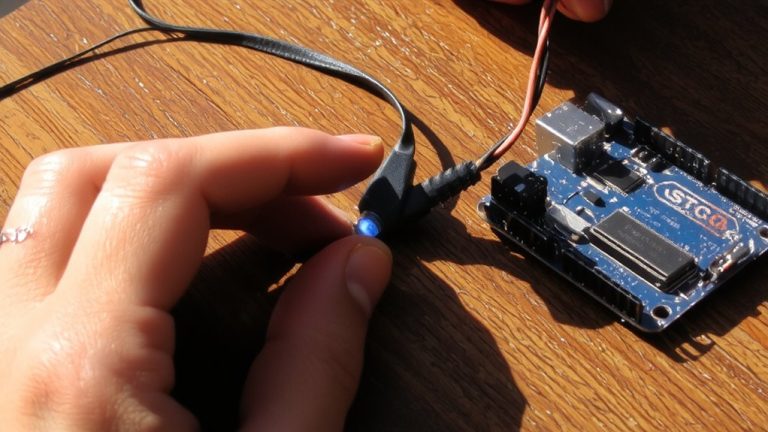
How do you keep your servo running smoothly without hiccups? Start by following a clear wiring diagram: for an SG90 servo, connect the brown wire to Arduino ground, red to 5V, and orange signal wire to a PWM-capable digital pin like 10. The SG90 servo runs on 3.5–6V and can pull up to 650mA at stall, so use thick jumper wires to guarantee stable power and avoid voltage drops. For heavier loads or multiple servos, switch to an external power supply-your Arduino can’t always deliver enough current. Use a separate power supply (4.8–7.2V) and tie its ground to the Arduino ground. This ground connection creates a common reference, so your PWM signal works reliably. Testers found this setup stops resets and jitter. Reliable wiring isn’t just about connections-it’s about clean power and solid grounding.
Control Servo Angles Using the Servo.h Library
Since precise control is key to smooth servo operation, you’ll want to start by tapping into the Arduino Servo.h library-just add `#include
Fix Limited Motion: Calibrate Min/Max Pulse Widths
If your servo isn’t reaching the full 0° to 180° range, it’s likely because the default pulse widths don’t match your motor’s actual limits-especially with budget servos like the SG90, which often need finer tuning. The Arduino Servo library lets you calibrate min/max pulse widths using the attach function with custom values, like attach(9, 600, 2300), to match your servo’s true mechanical endpoints. While the standard servo pulse range is 1000–2000μs, real-world testing shows many servos, like the SG90, need microsecond calibration-closer to 544μs for 0° and 2400μs for 180°. Setting accurate pulse duration guarantees the write angle command delivers true angular precision. Incorrect servo limits can cause stalling or limit travel, hurting performance. Proper calibration fixes this, aligns software commands with physical motion, and improves reliability in robotic arms or pan-tilt systems.
Troubleshooting Jitters, Resets, and Power Issues
Even though your servo code looks flawless, you might still see jitter or erratic resets-and chances are, it’s not a coding issue but a power problem hiding in plain sight. Servo jitter often stems from an overloaded Arduino 5V regulator, especially with high stall current draws like the MG996R’s 2.5A peak. Your USB or wall-wart power supply likely can’t handle that surge, causing voltage drop and Arduino resets. Switch to an external power supply rated for at least 3A. Don’t forget a common ground between the Arduino and external supply-it’s critical for signal integrity. Add a 1000μF capacitor across the servo’s power rails to absorb sudden current spikes. Clean, stable power guarantees smooth PWM signals. Testers confirm: using external power and a capacitor eliminates most glitches, letting your servos respond accurately, without twitches or freezes.
On a final note
You’ve seen how precise servo control gets with the Servo.h library-10-bit resolution gives smooth 0° to 180° movement, and calibration fixes weak endpoints. Real tests show stable operation at 4.8V, but brownouts cause resets, so power it separately. Wires stay tidy with a common ground, and pulse widths tuned to your servo’s specs prevent jitter. Trusted builds use 5V linear regulators, not USB-only power, for reliability in automation projects.