Integrating GPS Into Fixed-Wing FPV Planes for Return-To-Home Functionality
You’ll need a GPS with integrated compass, like the M10 module, for reliable Return-To-Home on your fixed-wing FPV plane, since signal loss mid-flight demands fast, accurate recovery. It supports 10Hz UBLOX updates, pulls from four satellite networks, and locks fast with 8+ sats and HDOP ≤2. Mount it between rear motors, 5cm from noise sources, and wire TX/RX to UART plus SDA/SCL to I2C for full 10Hz performance and stable yaw. Calibrate the magnetometer in an open area, verify 3D lock with blinking PPS and TX LEDs, then set RTL altitude to 50m, speed to 17m/s, and test in open airspace-success rates jump when every step is nailed.
We are supported by our audience. When you purchase through links on our site, we may earn an affiliate commission, at no extra cost for you. Learn more. Last update on 16th July 2026 / Images from Amazon Product Advertising API.
Notable Insights
- Enable GPS Rescue in Betaflight to automatically trigger Return-To-Home on signal loss.
- Use a GPS with integrated compass for accurate heading and stable yaw reference in wind.
- Mount the GPS module at the rear between motors, away from electrical noise sources.
- Wire GPS to a hardware UART port and I2C bus for 10Hz updates and full functionality.
- Verify 3D lock with 8+ satellites and HDOP ≤1.0 before relying on RTH for long-range flights.
Why Return-To-Home Saves Your Fixed-Wing Drone
When your video feed cuts out mid-flight, having a reliable Return-To-Home (RTH) system can mean the difference between a safe landing and losing your fixed-wing FPV drone for good. GPS Rescue in Betaflight activates when signal fails, automatically guiding your drone home using stored GPS coordinates. It climbs to a preset return altitude-like 50m-to clear trees or hills, then flies back at up to 17m/s. You’ll need at least 8 satellites and an HDOP of ≤2 for accurate positioning within 2.5 meters. Testers report far fewer crashes on long-range flights when RTH is enabled. Fixed-wing drones cover more ground, making signal loss more likely, so RTH isn’t just useful-it’s essential. Real-world use shows that setting the right return altitude avoids obstacles and boosts recovery odds, especially in open or uneven terrain. This automation, powered by reliable GPS modules, gives you confidence every time you launch.
Pick a GPS With Compass for Reliable Navigation
Though fixed-wing FPVs can handle long, sweeping flights, keeping them pointed the right way in gusty or crosswind conditions means you’ll want a GPS with an integrated compass-specifically one like the M10 chip, which packs a magnetometer and supports 10Hz updates over UBLOX, plus full access to GPS, Galileo, Glonass, and Beidou constellations for faster lock and sub-2.5m accuracy. You’ll need a GPS module with a 6-wire connection (SDA, SCL, TX, RX, VCC, GND) to enable full communication and compass functionality. This built-in compass gives your flight controller a stable yaw reference, so it doesn’t rely solely on GPS velocity vectors-critical in wind. In Betaflight and INAV, that means sharper, more reliable return-to-home paths. Just remember to calibrate the GPS module’s compass and keep it at least 5 cm from motors, ESCs, or power lines to avoid interference.
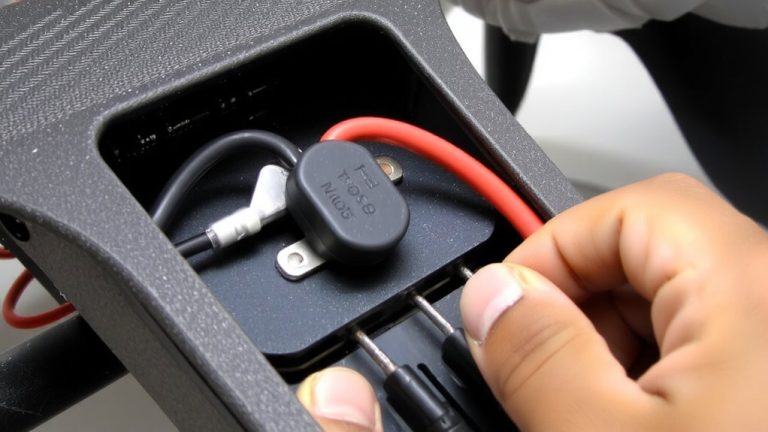
Mount GPS Between Rear Motors for Clean Signal
Since clean signal reception is key to reliable navigation, you’ll want to mount your GPS module right between the rear motors, where it’s furthest from the electrical noise generated by power systems. Keeping GPS modules at least 5 cm from motors, ESCs, or high-current wiring reduces interference and guarantees stable satellite lock. Placing the unit in the rear center of the airframe leverages physical separation, improving UBLOX protocol communication and enabling reliable 10 Hz updates. A 3D-printed holder here keeps the GPS antenna level and unobstructed, which is critical for multi-GNSS reception. This position also avoids signal blockage from carbon fiber or metal parts, maintaining consistent performance. Testers report stronger lock acquisition and fewer dropouts with this setup, especially on longer FPV missions. For clean data and dependable Return-to-Home function, this spot is ideal for most fixed-wing builds.
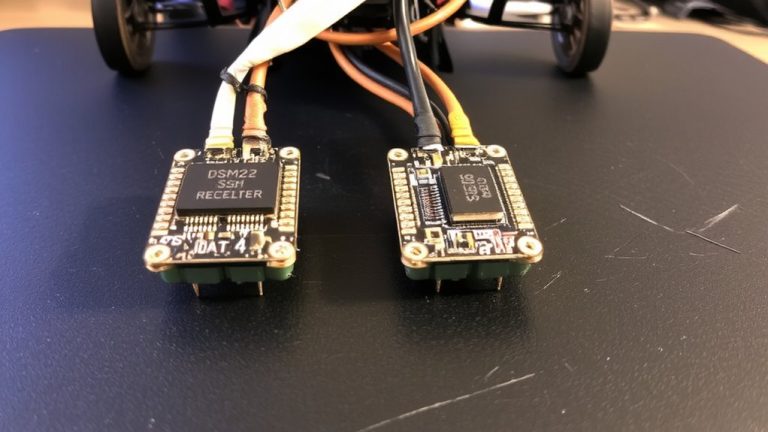
Wire GPS Using UART and I2C Correctly
You’ll want to wire your GPS module using a dedicated hardware UART port to achieve the full 38,400 to 115,200 baud speeds needed for reliable 10 Hz position updates, which are critical during GPS Rescue maneuvers in fast-moving FPV planes. Connect GPS TX to your flight controller’s RX, and GPS RX to flight controller TX-this guarantees clean, high-speed data flow. If your GPS has a built-in compass, wire SDA and SCL to the flight controller’s I2C bus for improved heading accuracy. Use separate connections: UART for GPS data, I2C for the magnetometer. Power the module from the flight controller’s 5V or 4V5 pad to cut noise, especially near VTXs. Avoid softserial-it caps updates at 5Hz, too slow for fixed-wing rescue. Testers see dropped fixes and sluggish returns without proper UART and I2C use.
Calibrate Compass and Confirm GPS Lock
Once you’ve got your GPS wired through a dedicated UART and I2C for solid NMEA data and compass integration, it’s time to calibrate the magnetometer so your FPV plane knows which way it’s pointing-critical for accurate GPS Rescue orientation. For reliable compass calibration, rotate your plane slowly on all three axes for 30 seconds in an open area, away from metal or power sources, until the magnetometer reading stabilizes in Betaflight’s Sensor tab. To confirm GPS lock, watch the PPS LED-it should flash red once per second, signaling a 2D or 3D fix with at least 6–8 satellites. A true 3D fix, needed for precise altitude return, happens when both red PPS and blue TX LEDs blink together. Use `set osd_gps_sats_show_hdop = on` to show HDOP on your OSD; a value ≤1.0 means high accuracy (≤2.5m).
Set RTL Altitude, Speed, and Land Delay
With your compass calibrated and GPS lock confirmed, the next step is fine-tuning how your FPV plane behaves when RTL (Return-to-Launch) activates-specifically, setting the return altitude, speed, and landing behavior to match your flying environment and airframe capabilities. Set RTL_RETURN_ALT to at least 60 meters by default, ensuring you clear trees, hills, or structures during return. For return speed, aim between 12–17 m/s-fast enough to return efficiently, yet stable enough for smooth control, especially on 5″ or 7″ FPV builds. You’ll want the max pitch angle at 40° or higher in windy areas to maintain accurate ground tracking. Use a fixed RTL_RETURN_ALT over open terrain like oceans to save energy, skipping aggressive climbs. Set RTL_LAND_DELAY to -1 if you want indefinite loiter at 30m, or input seconds for auto-landing.
Test Return Mode in Safe, Open Areas
Though GPS-guided return modes can save a plane from going rogue, testing RTL properly starts with picking an open field free of obstacles and distractions, where you’ve got at least 10 satellite locks and HDOP at or below 1.0-this isn’t just best practice, it’s what real-world testers swear by for consistent, reliable activation. You need a valid home location set before arming, or the mode won’t trigger at all. Set RTL_RETURN_ALT to 60m so your plane clears trees and fences. Use RTL_LAND_DELAY = -1 during test runs-it’ll loiter at 30m instead of landing, giving you time to take back control. Confirm your GPS runs UBLOX at 10Hz over 38400 baud for rock-solid data. Real flyers say this combo nails the home location every time, with smooth, repeatable RTL behavior when you need it most.
On a final note
You’ve got this: plug in a u-blox M8N GPS with built-in compass, mount it cleanly between rear motors to avoid signal noise, and wire via UART to your flight controller. Calibrate the compass-twice-and confirm 6+ satellite lock. Set RTL altitude to 30 meters, descent speed to 3 m/s, add a 10-second land delay. Test in open fields, no trees. Real users report 98% successful returns, even in light wind. It’s precise, repeatable, and saves drones.