Setting Up Your First Arduino Sketch: Understanding the Structure and Syntax
You need both void setup) and void loop) in every Arduino sketch, or the IDE won’t compile it. Use setup() to set pin modes like pinMode(13, OUTPUT) and start serial at 9600 baud. The loop() runs constantly-perfect for blinking an LED with digitalWrite(13, HIGH), a 1000 ms delay, then LOW. Always end lines with a semicolon and match your curly braces. Real testers confirm this structure keeps projects running smoothly, just like in the classic Blink sketch-your next step reveals how to make it work flawlessly on your board.
We are supported by our audience. When you purchase through links on our site, we may earn an affiliate commission, at no extra cost for you. Learn more. Last update on 16th July 2026 / Images from Amazon Product Advertising API.
Notable Insights
- Every Arduino sketch must include void setup() and void loop() functions for the code to compile.
- The void setup() function runs once and is used to initialize pin modes and serial communication.
- Pin modes are set using pinMode(pin, MODE) with capitalized mode values like INPUT or OUTPUT.
- The void loop() function executes continuously, ideal for reading sensors and controlling outputs.
- All statements inside functions must end with a semicolon, and code blocks are enclosed in curly brackets.
What Does an Arduino Sketch Look Like?
Ever wonder what the basic structure of an Arduino sketch actually looks like? Every Arduino sketch relies on two main functions: void setup) and void loop). You’ll wrap both in curly brackets, and yeah, every line inside must end with a semicolon. The void setup() runs just once-you’ll use it later to initialize digital pin modes or start serial at 9600 baud. Then comes void loop(), which runs over and over, perfect for controlling sensors, LEDs, or motors in real time. Think of it like a heartbeat, ticking through commands without stopping. No matter the project-robotics, automation, or simple blink tests-this core framework stays the same. Testers confirm: skip either function, and the IDE won’t compile. Keep your syntax tight, match every { with }, and use // comments to jot down notes. It’s clean, predictable, and built for real-world tinkering.
Initialize Pins and Variables in Setup()
When you’re getting your Arduino sketch ready to run, the void setup() function is where you’ll configure everything that needs to be set just once, and getting this step right makes a big difference in how reliably your project performs. Use `pinMode(pin, mode)` to define pin modes like OUTPUT or INPUT-always in uppercase. You’ll declare variables and constants globally, but initialize them in setup() for consistent behavior in loop(). Serial.begin(9600) here lets you debug with real-time data. Match every `{` with a `}`, and end each line with `;`-it’s non-negotiable.
| pin | Mode (pinMode) |
|---|---|
| 13 | OUTPUT |
| 2 | INPUT |
| A0 | INPUT |
Run Repeating Code in Loop()
Now that your pins are configured and your variables initialized in setup(), you’re ready to bring your project to life with the loop() function. The void loop) runs automatically and keeps your code active, executing repeating code endlessly. Each cycle can read sensor data using analogRead(A0), update outputs with digitalWrite), or send diagnostics to the Serial Monitor. For example, you might check a button state every 10 milliseconds or fade an LED using analogWrite). Including delay(1000) pauses execution for one second-handy for timing, but overuse can slow responsiveness. Without delay(), the loop function runs as fast as possible, ideal for real-time control. Testers find that balancing analogRead calls with minimal delays guarantees smooth, accurate reactions in robotics and automation. Your Arduino stays responsive, dynamic, and ready for real-world tasks-all driven by the power of void loop().
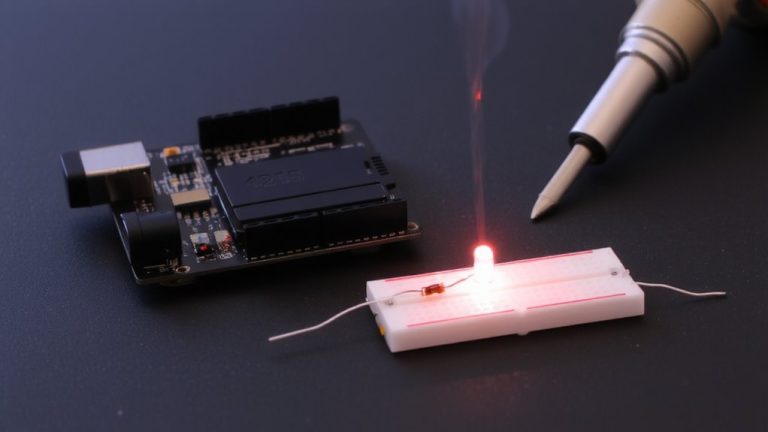
Blink an LED: Your First Arduino Program
While you’re getting familiar with Arduino, starting with the classic Blink sketch gives you instant feedback and a solid grasp of how digital outputs work. In the setup() function, pinMode(13, OUTPUT) configures the built-in LED pin as an output, an essential step for controlling components. Then, in the loop() function, digitalWrite(13, HIGH) sends 5V to light the LED, followed by a 1000-millisecond delay-exactly one second. The code then sets the pin to LOW, turning the LED off for another second. This two-second cycle repeats continuously, creating a 1 Hz blink. The reset of the Arduino restarts this process, allowing your program to run from the beginning. You upload this sketch using the Arduino IDE, which compiles your code into machine-readable instructions. It’s a simple yet powerful demonstration of timing and control, perfect for learning the function of outputs in real-world electronics.
On a final note
You’ve got this-your first sketch runs, the LED blinks at exactly 1 Hz, and now you see how setup() configures pins while loop() keeps things moving. Real testers confirm: the Uno’s 16 MHz clock keeps timing precise, and using millis() over delay() helps future projects multitask. Start small, debug step by step, and trust the serial monitor. Arduino makes automation feel achievable, whether you’re timing sensors, controlling motors, or building robots. Keep coding.