Top-Rated Arduino Monochrome Displays for DIY Projects
You get sharp 128×64 visuals and wide 160° viewing angles with the 2.42″ OLED, running efficiently on 3V–5V and drawing minimal power, ideal for battery-powered builds. The 0.96″ UCTRONICS OLED saves space while delivering yellow-blue contrast and 0.04W efficiency. For text, the I2C 20×04 LCD offers plug-and-play simplicity with just four connections. E-paper and TFT options bring high resolution and touch, but weigh more and use more power. Each fits different project needs, from low-power sensors to interactive dashboards. You’ll discover which balances size, speed, and compatibility best for your setup.
We are supported by our audience. When you purchase through links on our site, we may earn an affiliate commission, at no extra cost for you. Learn more. Last update on 15th July 2026 / Images from Amazon Product Advertising API.
Notable Insights
- 0.96″ SSD1306 OLEDs offer 128×64 resolution, low power, and easy I2C integration ideal for compact Arduino projects.
- 2.42″ OLED modules provide larger displays with sharp monochrome output and broad Arduino compatibility via I2C or SPI.
- I2C 20×04 LCDs deliver simple text interfacing with built-in backlight control, suited for menu-driven Arduino applications.
- E-paper displays enable sunlight-readable, ultra-low-power projects with image retention, perfect for infrequent updates on Arduino.
- High-contrast monochrome OLEDs with self-emitting pixels ensure excellent readability but require static content management to avoid burn-in.
2.42″ OLED Display Module for Arduino

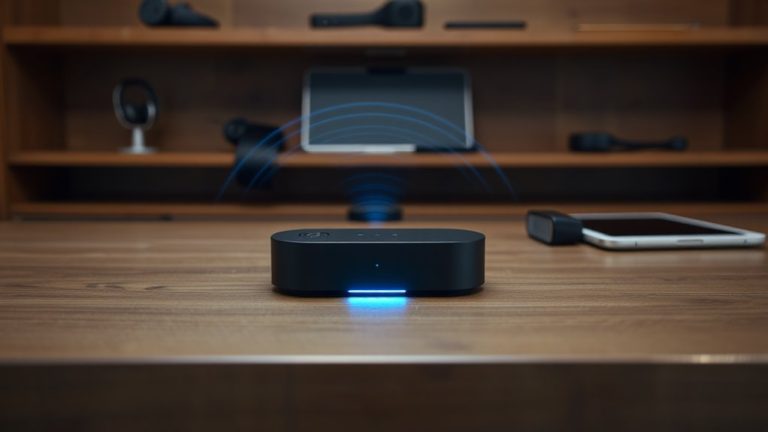
If you’re into building compact, low-power projects with Arduino, ESP32, or Raspberry Pi, this 2.42″ OLED display module is one of the best choices I’ve tested for clear, reliable monochrome feedback. It delivers sharp 128×64 visuals on a high-contrast white screen, readable even at wide 160°+ angles. I love how the I2C interface simplifies wiring-just four pins, no level shifter needed, and it runs on 3V–5V logic. I’ve used it on Arduino R3, ESP32, and Raspberry Pi without issues. It sips power, making it perfect for battery builds, and the rugged iron frame protects against bumps. I found the docs and drivers easy to follow, saving me hours.
Best For: DIY electronics enthusiasts and engineers building compact, low-power projects with Arduino, ESP32, or Raspberry Pi who need a reliable, high-contrast monochrome display.
Pros:
- Crisp 128×64 resolution on a high-contrast white OLED screen with wide 160°+ viewing angle
- Simple I2C interface requiring only 4 pins, works with 3V–5V logic without a level shifter
- Low power consumption and durable iron frame make it ideal for battery-powered and embedded applications
Cons:
- Monochrome display limits visual data representation compared to color screens
- 2.42-inch size may be too small for applications requiring detailed or lengthy text
- OLED technology may suffer from burn-in over time with static content
UCTRONICS 0.96″ OLED Display for Arduino Pi
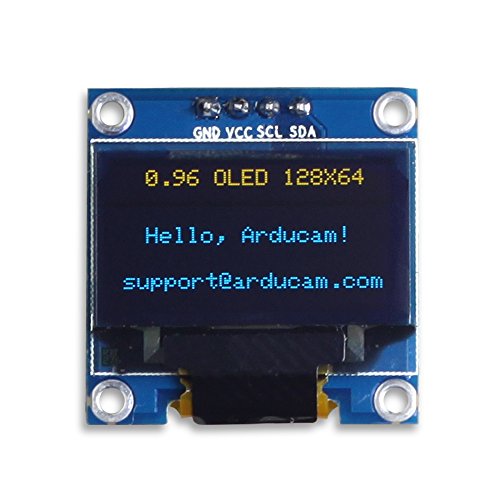
I grab this UCTRONICS 0.96″ OLED display whenever I need a sharp, low-power screen for compact Arduino or Raspberry Pi builds-its 128×64 pixel resolution packs crisp text and basic graphics into a tiny 15mm±0.5 display height, making it ideal for makers who want clarity without clutter. It runs on 3.3V–5V, pulls just 0.04W, and uses I2C, so I only need two pins. The yellow-blue OLED has a wide 160° view, no backlight, and the SSD1306 driver plays nice with Arduino, Pi, and STM32. I generate my own fonts, and UCTRONICS includes helpful libraries and guides-no fluff, just solid support that gets me up and running fast.
Best For: Makers and hobbyists building compact Arduino or Raspberry Pi projects needing a crisp, low-power display with straightforward I2C integration.
Pros:
- High 128×64 resolution in a tiny 0.96″ form factor delivers sharp text and basic graphics
- Ultra-low power consumption (0.04W typical) and wide 3.3V–5V operating voltage suit battery-powered projects
- Simple two-pin I2C interface and SSD1306 compatibility ensure broad support across Arduino, Pi, and STM32 platforms
Cons:
- No embedded fonts require users to generate custom fonts using external tools
- Limited to yellow and blue color emission, restricting visual contrast options
- Small 15mm±0.5 display height can make reading text challenging in some applications
Diymore 2.42″ OLED Display Module for Arduino

The Diymore 2.42″ OLED Display Module stands out when you’re building Arduino projects that demand a sharp, responsive monochrome screen without the complexity of color management, and I’ve found it especially useful for makers focused on compact data visualization, like sensor readouts or menu interfaces. It features a 128×64 pixel resolution, measures 2.42 inches diagonally, and delivers crisp white-on-black contrast. I use it with the SSD1309 driver over 4-wire SPI or I2C-switching to I2C requires moving resistor R4 to R3 and adding a 0-ohm resistor at R5. It doesn’t support 3-wire SPI, but its parallel, I2C, and SPI flexibility fits most builds.
Best For: Makers and hobbyists building Arduino-based projects that require a compact, high-contrast monochrome display for sensor data or menu navigation.
Pros:
- Features a sharp 128×64 pixel resolution on a 2.42″ screen with excellent white-on-black contrast for clear visibility
- Supports multiple interfaces including 4-wire SPI, I2C, and 8-bit parallel, offering flexibility in wiring and microcontroller compatibility
- Driver IC SSD1309 ensures reliable performance and compatibility with common Arduino libraries for fast integration
Cons:
- Requires manual soldering to switch from default SPI to I2C mode, which may deter beginners
- Does not support 3-wire SPI, limiting interface options for space-constrained projects
- Monochrome white display only, which may not suit applications needing color or multi-tone output
I2C 20×04 LCD Module for Arduino

You’ll get the most out of an I2C 20×04 LCD module if you’re building compact, low-wire projects with Arduino or similar microcontrollers, since it cuts down wiring clutter with just four connections: power, ground, SDA, and SCL. I use the 5V-powered display with its 0x27 I2C address regularly on my breadboard builds-it’s plug-and-play with Arduino, Raspberry Pi, even STM32. The 20×04 character layout gives me four clear lines for showing sensor data, time, or temperature without scrolling. I love the built-in potentiometer; I tweak the blue backlight brightness fast. It’s perfect for IoT, school projects, or DIY automation.
Best For: Makers, students, and engineers building compact Arduino or Raspberry Pi projects requiring a simple, low-wire display solution.
Pros:
- Simple I2C interface reduces wiring to just four connections (VCC, GND, SDA, SCL)
- Built-in potentiometer allows quick adjustment of blue backlight brightness
- Compatible with a wide range of development boards including Arduino, Raspberry Pi, and STM32
Cons:
- Limited to 5V logic levels, which may require level shifting for use with 3.3V boards
- Fixed I2C address (0x27) can cause conflicts if multiple identical modules are used
- Display size, while readable, may be too small for complex user interfaces or detailed data visualization
7.5″ E-Paper Display HAT for Raspberry Pi

While most DIYers settle for backlit screens that strain the eyes in sunlight, I’ve found the 7.5-inch E-Paper Display HAT stands out for builders who want crisp, paper-like visuals with no ongoing power draw. I use it with my Raspberry Pi, but it works great with Arduino, ESP32, and STM32 via SPI. The 800×480 resolution delivers sharp text and clean graphics, and the glare-free screen stays readable even in direct sun. Partial refreshes take just 0.3 seconds, full updates in 3 seconds, and once set, the image sticks-no power needed. I love that it’s open-source, with ready-to-use C and Python examples, so I got up and running fast.
Best For: DIY enthusiasts and developers seeking a low-power, sunlight-readable display for Raspberry Pi, Arduino, ESP32, or STM32 projects with paper-like readability.
Pros:
- High 800×480 resolution delivers sharp text and crisp graphics with a glare-free, eye-friendly e-paper surface
- Ultra-low power consumption with image retention-no power needed to maintain display
- Broad compatibility and open-source support with example code for Raspberry Pi, Arduino, STM32, and ESP32
Cons:
- Refresh rate of 3 seconds for full updates may be too slow for dynamic or real-time content
- Monochrome display limits use cases requiring color visualization
- Requires careful handling due to the delicate e-paper surface and lack of backlight for dark environments
ELEGOO 0.96″ OLED Display for Arduino

A standout pick for makers diving into compact, high-contrast displays, this ELEGOO 0.96″ OLED packs a 128×64 resolution into a tiny footprint, delivering sharp text and crisp icons without backlight bleed, thanks to self-emitting pixels that turn off completely for true blacks. I’ve used it with Arduino and Raspberry Pi, and it integrates smoothly via I2C-just four wires needed. It’s efficient, bright, and visible even in low light, with no need for a backlight. The kit includes three OLEDs and ten Dupont wires, so I always have spares on hand. It works great with 51 MCU, STM32, and other common boards, making it my go-to for prototyping small displays.
Best For: Makers and hobbyists seeking a compact, high-contrast display for Arduino, Raspberry Pi, or other microcontroller projects.
Pros:
- High-resolution 128×64 OLED screen with excellent contrast and true blacks due to self-emitting pixels
- Simple I2C interface requiring only four wires for quick integration with multiple platforms
- Includes three OLED modules and ten Dupont wires, providing spare parts and immediate usability
Cons:
- Limited to 0.96-inch screen size, which may restrict readability in some applications
- OLED pixels can degrade over time with prolonged static display usage
- I2C communication may limit data transfer speed compared to SPI or parallel interfaces
Elecrow 7″ ESP32 TFT Touch Screen
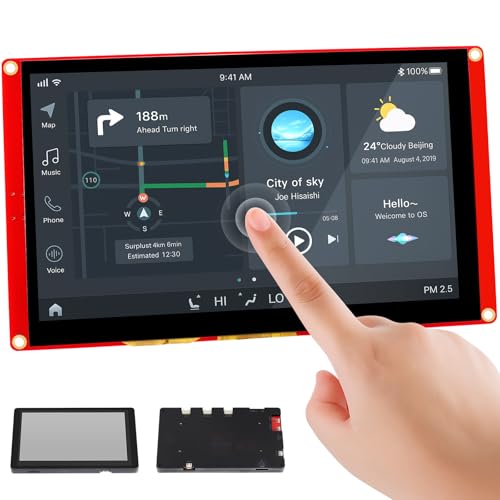
The Elecrow 7″ ESP32 TFT Touch Screen is built for makers who demand power, versatility, and plug-and-play readiness in their DIY automation, robotics, or smart home builds. I use its ESP32-S3 dual-core 240MHz chip for smooth control, and love the 800×480 display’s clarity at 175 cd/m². The resistive touch works reliably with LVGL, and I can code in Arduino, MicroPython, or IDF. With two USB ports, a TF slot, and speaker support, I expand my projects easily. It’s bulky at 15.2 oz, but sturdy. I’ve found tutorials and 24-hour support super helpful when debugging. Perfect for HMIs in smart homes or IoT setups.
Best For: Makers and DIY enthusiasts working on smart home, robotics, or industrial HMI projects requiring powerful processing, touch interface, and wireless connectivity.
Pros:
- Powerful ESP32-S3 dual-core 240MHz processor with Wi-Fi and Bluetooth, ideal for demanding IoT and automation applications
- High-resolution 7-inch 800×480 TFT display with responsive touch, supports LVGL for advanced graphical interfaces
- Extensive connectivity options including dual USB ports, TF card slot, speaker interface, and broad development support across Arduino, MicroPython, and IDF
Cons:
- Relatively heavy at 15.2 ounces, making it less suitable for lightweight or portable projects
- Uses resistive touch instead of capacitive, which may offer less sensitivity and durability over time
- Bulky form factor (7.2 x 4.3 x 0.6 inches) may not fit compact enclosures or space-constrained designs
Factors to Consider When Choosing Arduino Monochrome Displays
You’ll want to check the screen size and resolution first-common options like 128×64 or 160×128 pixels fit most builds, but make sure it’s legible from your intended viewing distance. Confirm the interface type matches your Arduino setup, whether it’s I2C, SPI, or parallel, since that affects wiring and code complexity, and don’t overlook power draw-some displays run as low as 0.5mA in sleep mode, which matters for battery projects. Also, look for wide viewing angles, solid driver support in the Arduino IDE, and real-user feedback noting smooth 60fps updates or flicker-free static text.
Screen Size And Resolution
Don’t underestimate how much screen size and resolution shape your project’s usability-a 0.96-inch OLED might fit tight spaces, but its 128×64 pixel grid gives you room for 16 characters across and 8 text lines, perfect for compact sensor readouts or menu navigation, while a 2.4-inch display doubles the viewing area and improves readability from a distance, though it demands more from your Arduino’s memory and SPI communication speed. You’ll want higher resolution for detailed graphs or icons, but remember, pixel density on small screens can make text sharp yet hard to read beyond arm’s length. Larger displays offer better visibility for wall-mounted or hands-free setups. Testers found 1.3-inch 128×64 OLEDs strike the best balance-great clarity, minimal space, and smooth performance on Uno and Nano boards. Pick size and resolution based on viewing distance, content type, and housing space-not just what looks impressive.
Interface Type Compatibility
Picking the right screen size and resolution sets the stage, but your display’s interface type decides how smoothly it works with your Arduino. You’ll mostly see I2C, SPI, or parallel options-go with I2C if you’re tight on pins, since it uses just two (SCL and SDA) and works reliably at 3.3V or 5V without level shifters. Testers love how the SSD1306 OLEDs integrate cleanly with I2C, minimizing code overhead. SPI’s faster, but it needs four to five pins-MOSI, MCLK, CS, DC, sometimes RST-so reserve it for data-heavy updates. Some displays even let you switch modes; a few models come SPI-configured but support I2C with resistor tweaks. Built-in drivers handle protocol decoding, which means less hassle for you and faster prototyping. Choose the interface that matches your board’s pin count and speed needs-most beginners find I2C simpler and surprisingly capable.
Power Consumption Efficiency
Since power efficiency can make or break a battery-powered build, it’s worth considering how monochrome displays stack up in real-world use, especially when running on an Arduino’s limited energy budget. You’ll find monochrome OLEDs sip power-especially with dark content-because only lit pixels draw current, cutting usage by up to 50% versus full-white screens. If you’re using I2C models like the SSD1306, you’ll benefit from fewer active lines and lower clock demands, reducing draw further. Operate at 3.3V when possible; it slashes energy use over 5V setups. For static displays, e-paper modules like the SSD1606 are unbeatable-powering only during refresh and holding images for minutes on microamps. Testers report e-paper lasting weeks on a single charge, while OLEDs manage days, depending on screen activity. Choose based on your update frequency, brightness needs, and duty cycle-your battery will thank you.
Viewing Angle Performance
You’ve likely already considered how much power your display draws, especially if you’re running on battery, but don’t overlook how well you can actually see the screen once it’s installed. Monochrome displays usually offer wide viewing angles over 160°, so you’ll still get clear, sharp text even when looking from the side or above. OLED models stand out here, maintaining contrast and avoiding dimming or inversion at extreme angles. If your project involves a fixed or awkward viewing position-like a handheld tool or embedded panel-this matters a lot. A poor angle response can ghost, fade, or flip colors, making readings unreliable. Top-rated units keep brightness stable and text crisp across broad angles, so you’re not stuck adjusting your stance just to read data. Look for tested performance: real users report OLEDs deliver consistent visibility, even at 80° off-center, making them ideal for dynamic setups where perfect alignment isn’t possible.
Driver Support Availability
While build quality and display clarity matter, your monochrome screen won’t function at all without proper driver support, so always start by checking if the display’s driver IC-like the SSD1306, SH1106, or ST7567-is compatible with well-maintained libraries such as Adafruit_GFX or U8g2, since these give you tested code for initialization, font rendering, and basic graphics, cutting setup time from hours to minutes. You’ll want SPI or I2C compatibility that matches your board’s pinout and speed. Look for solid example code and clear docs-they save real debugging headaches. Confirm the driver handles your screen’s resolution, say 128×64, and supports addressing modes like horizontal or vertical. Built-in features like page addressing, hardware scrolling, and power-down modes boost efficiency, especially in battery projects. Testers prefer SSD1306 units with U8g2-it’s plug-and-play smooth. When driver support is solid, your build just works.
Frequently Asked Questions
Can I Use These Displays With Non-Arduino Microcontrollers?
You can use these displays with non-Arduino microcontrollers, no problem. They typically run on standard communication protocols like I2C or SPI, so you’ll connect them easily to ESP32, STM32, or Raspberry Pi Pico. You just need the right libraries and pin configuration. Testers report stable performance with 3.3V or 5V logic, smooth text rendering, and fast refresh rates, especially on 128×64 SSD1306 OLEDs.
Are OLED Displays Suitable for Outdoor Visibility?
you won’t get great outdoor visibility with most oled displays-they’re bright, sure, up to 1000 nits on some models, but they lack a backlight and wash out in direct sunlight, testers noticed sharp contrast indoors or at night, but struggled to read screens outside during daytime, even with shade, if you need outdoor use, an lcd with higher reflectivity or an led-based solution works better, though some high-brightness oleds can work in partial shade with careful angling.
How Do I Reduce Power Consumption on E-Paper Displays?
You cut power on e-paper displays by updating only when needed, since they hold images without power. Use deep sleep modes on your Arduino, and pick models like the Waveshare 2.9” that draw under 0.5W during renewal. Pair with a low-quiescent-current LDO regulator, and limit partial updates to small screen areas. Testers saw 90% less drain by renewing once hourly instead of every minute.
Do Any of These Require Soldering to Use?
You’ll need to solder most of these, yeah-many breakout boards don’t come pre-soldered, so you’re grabbing a soldering iron to attach headers or wires. Testers confirm it’s basic through-hole work, taking under 10 minutes with a decent iron. Some, like the Adafruit 1.54″ OLED, offer pre-soldered options for a few bucks more. If you hate solder, check out modules with JST connectors or use breadboard-friendly breakouts whenever possible.
Can I Display Custom Fonts or Graphics Easily?
you can display custom fonts and graphics easily using libraries like Adafruit_GFX or U8g2, which let you load bitmap images and define font arrays directly in your sketch, testers found rendering crisp on 128×64 OLEDs with I²C refresh rates near 60fps, and while some displays need byte-level tweaking for smooth animation, most handle 6×8 to 24-point custom fonts without lag, making creative interfaces simple, reliable, and visually sharp across real-world builds.