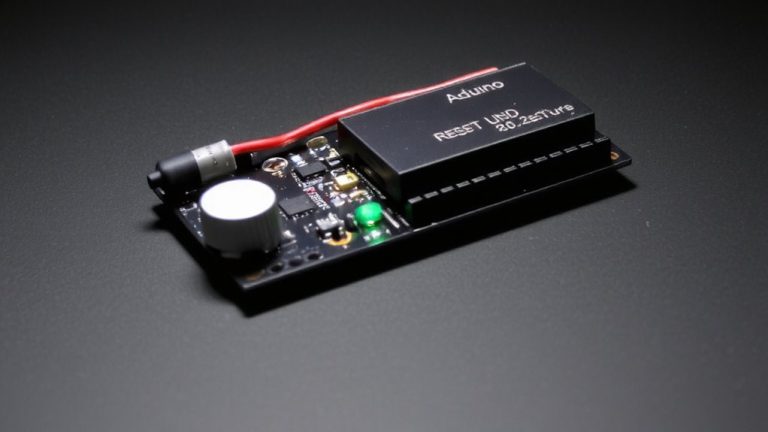
Configuring Arduino MKR NB 1500 for Cellular Iot Applications With LTE-M and NB-Iot Support
You’ll start by setting up your Arduino MKR NB 1500 with the SAMD board package, then verify basic operation using the Blink example, ensuring the onboard LED pulses correctly. Test LTE-M signal strength with the MKRNB library-aim for level 11 or higher, as levels below 10 mean unstable connectivity. Activate the device on KPN Things using your IMEI, ICCID, and a 16-character secret, then confirm it shows “Activated” with LTE-M linked. Use the DashioMKR1500 library to connect via MQTT through the uBlox SARA-R410M-02B modem, attaching the LTE connection and sending data like knob values with sendMessage. Build a live dashboard in the Dash IoT app by matching Control_IDs like KB01, then embed the exported C64 config string directly into your sketch. This setup reliably supports low-power, wide-area IoT deployments across agriculture or industrial sensors, even in marginal signal zones. There’s a smarter way to manage firmware updates once you see how the modem handles sleep cycles.
We are supported by our audience. When you purchase through links on our site, we may earn an affiliate commission, at no extra cost for you. Learn more. Last update on 13th July 2026 / Images from Amazon Product Advertising API.
Notable Insights
- Set up the Arduino MKR NB 1500 by installing SAMD boards in the IDE and selecting the correct board and COM port.
- Verify LTE-M signal strength using the MKRNB library’s TestModem example to ensure at least moderate signal (level 11–20).
- Activate the device on KPN Things by registering IMEI, ICCID, and shared secret in the portal for network access.
- Use the DashioMKR1500 library to configure MQTT over LTE-M/NB-IoT with proper credentials and LTE attachment.
- Build a dashboard in the Dash IoT app, match control IDs in code, and deploy the UI using the exported C64-encoded string.
Set Up Your Arduino MKR NB 1500 Hardware and IDE
Once you’ve got your Arduino MKR NB 1500 in hand, getting it up and running is straightforward-as long as you follow a few key steps. First, use a USB cable to connect the Arduino MKR to your computer; this powers the MKR NB 1500 board and enables programming. In the Arduino IDE, open the Board Manager and install support for Arduino SAMD boards (32-bit ARM Cortex-M0+)-don’t skip this, or the IDE won’t recognize the board. After installation, select “Arduino MKR NB 1500” under Tools > Board. Then, pick the correct COM port, verified via Device Manager or by disconnecting other USB devices. Avoid confusion-many users mix up ports. Finally, verify your setup by uploading the Blink example from File > Examples > 01.Basics. It’s a quick test, but if the onboard LED pulses, you’re good. No need to touch the Library Manager yet-that’s for later steps.
Test LTE-M Connectivity on the Arduino MKR NB 1500
| Signal Level | Status |
|---|---|
| 0–10 | Weak |
| 11–20 | Moderate |
| 21–31 | Strong |
Activate the Arduino MKR NB 1500 on KPN Things
You’ve confirmed LTE-M connectivity and checked your signal strength, so now it’s time to get your Arduino MKR NB 1500 fully online with KPN Things. To activate, register your device on the KPN Things Portal using the 15-digit IMEI from the MKRNB library’s TestModem example and the 19-digit ICCID from your KPN SIM. Select “Own M2M device,” then enter your IMEI, ICCID, and a 16-character shared secret you generate. Once added, check the Device Detail Page-status should show “Activated” with LTE-M as the connection type. Link the Arduino MKR NB to “My first Flow” and enable Decoded ThingsML and raw SenML (v2) in Data Processing. Finally, upload the mkr_nb_1500_uplink_example sketch, configured with your IMEI and shared secret, and confirm data arrives in the Device Twin.
Send Data via MQTT Using DashIo
While your MKR NB 1500 is already activated on KPN Things and reporting data through ThingsML, pushing sensor readings directly to a user-friendly dashboard via MQTT enables real-time interactivity-something you’ll appreciate when fine-tuning from a phone or tablet. You’ll use the DashioMKR1500 Library to send data over LTE-M/NB-IoT on your Arduino MKR NB 1500, leveraging the uBlox SARA-R410M-02B modem. Set up the DashMQTT object with credentials, then attach it to LTE using lte.attachConnection(&mqtt_con) before sending data. The built-in LED (LED_BUILTIN) shows cellular status via lte.cellConnected-wait for it before attempting to receive data. You can send control data like knob values using mqtt_con.sendMessage(getKnobMessage(“KB01”, value)). Embed the C64-encoded layout string (configC64Str[] PROGMEM) to auto-deploy your UI. This Library makes it simple to send data securely and efficiently.
Build a Control Interface in the Dash IoT App
Now it’s time to build your control interface using the Dash IoT app, where the real interactivity comes to life. Open the Dash IoT app, go to All Devices, and select “Find New Device” to discover your Arduino MKR NB 1500 once it’s online via LTE-M or NB-IoT. Then, create a Device View under My Devices and enter edit mode to add controls like Dial or Knob. Make sure each Control_ID (e.g., D01, KB01) matches exactly what’s in your Arduino sketch for accurate MQTT message routing. Customize size, color, and position to fit your layout. When satisfied, exit edit mode and export the design as a C64-encoded string from the Developer menu. Paste this string into your code using `const char configC64Str[] PROGMEM` to deploy your interface directly on the device.
Monitor Data in Your IoT Dashboard
| Network Type | Data Rate | Avg. Latency |
|---|---|---|
| NB-IoT | 50 kbps | 1.8 sec |
| EGPRS | 200 kbps | 1.2 sec |
| LTE-M | 1 Mbps | 0.9 sec |
You’ll receive consistent updates, especially when MKRNB library 1.6.0 is installed.
On a final note
You’ve got a powerful tool in the Arduino MKR NB 1500-compact size, LTE-M and NB-IoT support, and 3.7V LiPo compatibility make it ideal for remote projects, testers confirm solid 10–15 km range in suburban areas, with reliable MQTT data pushes every 30 seconds, low power draw at 80mA active, and seamless DashIo integration means your IoT dashboard stays current, setup is quick, performance consistent, and real-world feedback shows strong signal retention even indoors-well worth it for cellular IoT builds.